
Walkthrough: Running an OWIN Self-Hosted Web API in a Windows Docker Container
Tuesday, September 1, 2015
When ASP.NET 5 and .NET Core were first announced, there was a lot of excitement over the ability to run ASP.NET in Docker containers on Linux.
But what about .NET 4.5 apps that only run on Windows? Well, they finally got some love with the introduction of containers support in Windows Server 2016 Technical Preview 3. Now we can run OWIN self-hosted apps in Docker containers on Windows.
While ASP.NET MVC 5 (not to be confused with MVC 6 on ASP.NET 5) cannot run without IIS, ASP.NET Web API and SignalR apps can (thanks to OWIN self hosting). In this article we'll go over how to create a self-hosted ASP.NET Web API app and run it in a Docker Windows Server Container.
Docker Host Setup and Configuration
If you don't already have a Docker host, check out my previous article to get one up and running.
Creating a Self-Hosted Web API Application
Now we'll create a sample OWIN self-hosted application. Skip to the next section if you already have one you want to use.
Start Visual Studio and create a new Console Application.

Open up the Package Manager Console and install Microsoft.AspNet.WebApi.OwinSelfHost from Nuget. This package adds ASP.NET Web API and the ability to self-host it using OWIN.
PM> Install-Package Microsoft.AspNet.WebApi.OwinSelfHost
Create a class file called Startup.cs and paste in this code:
using Owin;
using System.Web.Http;

namespace WebApiDocker
{
    public class Startup
    {
        public void Configuration(IAppBuilder app)
        {
            HttpConfiguration config = new HttpConfiguration();
            config.Routes.MapHttpRoute(
                name: "DefaultApi",
                routeTemplate: "api/{controller}/{id}",
                defaults: new { id = RouteParameter.Optional }
            );

            app.UseWebApi(config);
        }
    }
}
And we'll add this code into Program.cs to bootstrap the OWIN host. Note that we're using http://*:80/ so that application binds to all network interfaces:
using Microsoft.Owin.Hosting;
using System;

namespace WebApiDocker
{
    class Program
    {
        static void Main(string[] args)
        {
            string baseAddress = "http://*:80/";

            using (WebApp.Start<Startup>(url: baseAddress))
            {
                Thread.Sleep(Timeout.Infinite);
            }
        }
    }
}
The last step is to add a Web API controller. Create a file called ValuesController.cs:
using System.Collections.Generic;
using System.Web.Http;

namespace WebApiDocker
{
    public class ValuesController : ApiController
    {
        public IEnumerable<string> Get()
        {
            return new List<string> { "ASP.NET", "Docker", "Windows Containers" };
        }
    }
}
Now run the application and browse to http://localhost/api/values, it should display the results of the API call. (Because the application binds to all network interfaces, you may need to start the app as an administrator)
Creating the Dockerfile
We are now ready to build a Docker image for our application. The first step is to create a Dockerfile that specifies how the image should be built.
Create a text file called Dockerfile with the following contents:
FROM windowsservercore
ADD . /app
WORKDIR /app
ENTRYPOINT ["cmd.exe", "/k", "WebApiDocker.exe"]
This tells Docker to:
- Use
windowsservercore as the base image
- Copy the contents of the current folder into a folder in the image called
/app
- Use
/app as the working directory when the container is run
- Start
WebApiDocker.exe (or whatever your main application is called) when the container is run
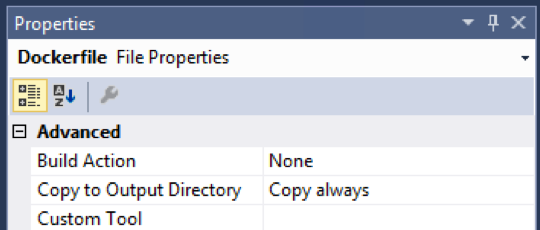
We need to add this file to the project and set it to "Copy Always". This copies the file to the output directory.
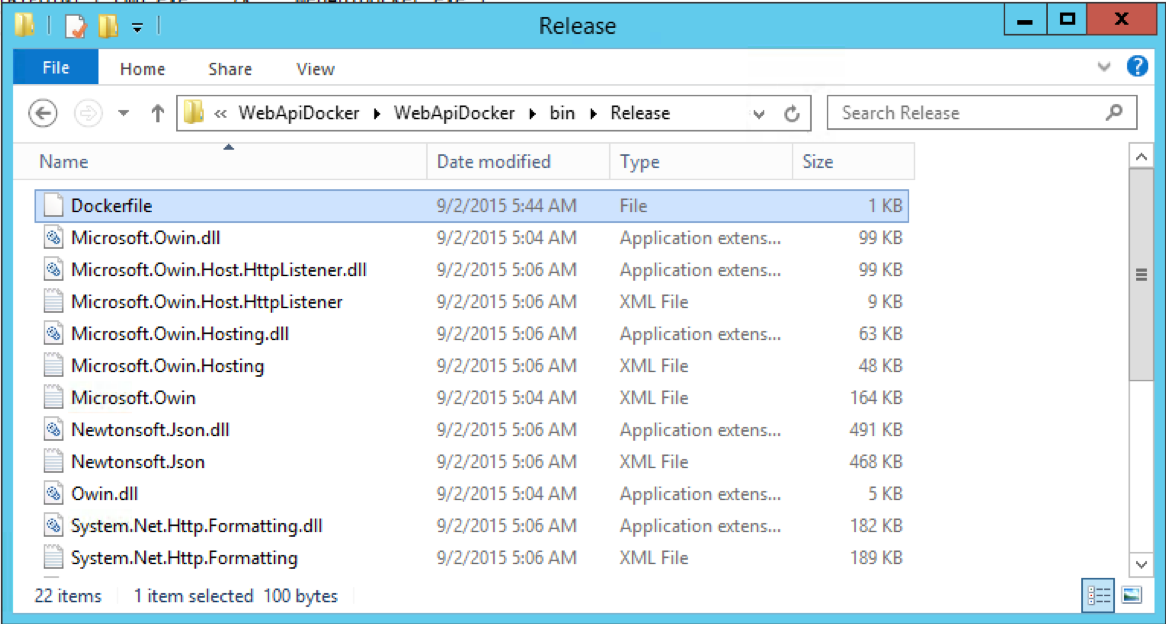
Now we can build the application in Release mode. After the build, check that the Dockerfile and all necessary files are in the output folder:
Building the Docker Image
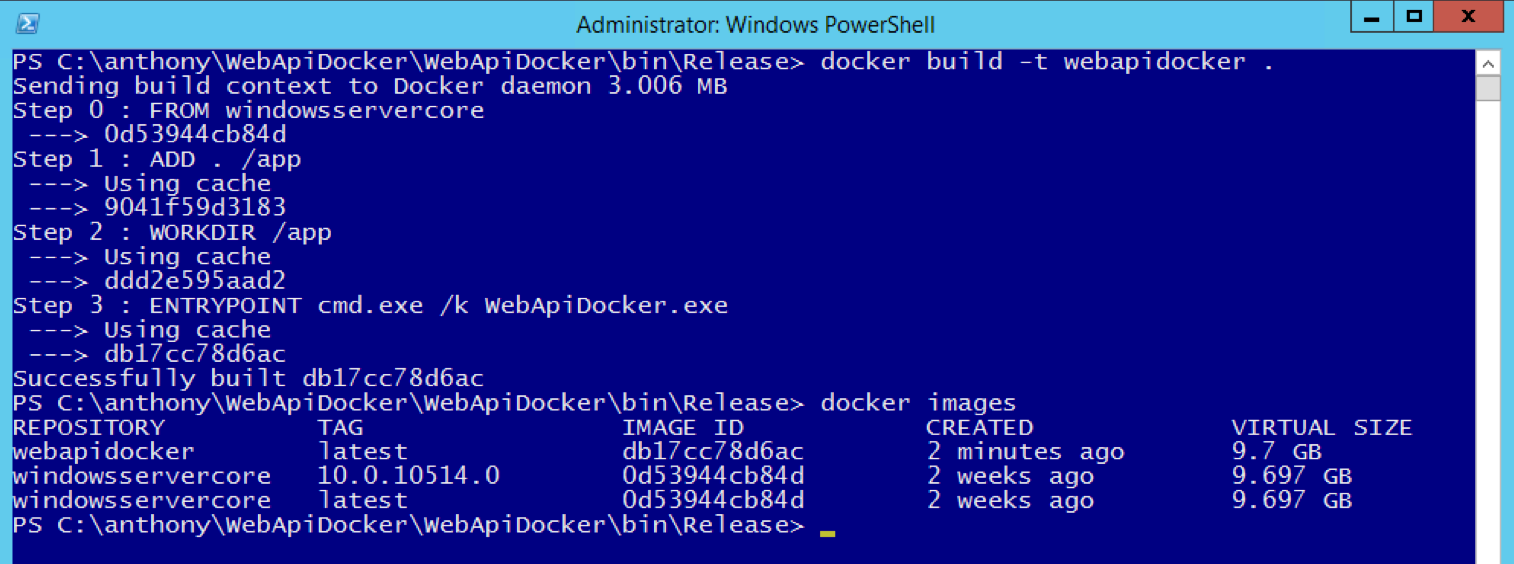
Start a PowerShell prompt and change to the applications build output folder.
Build the Docker image (-t specifies a repository name):
PS> docker build -t webapidocker .
After the build completes, the image should appear when you run docker images:
Running a Container
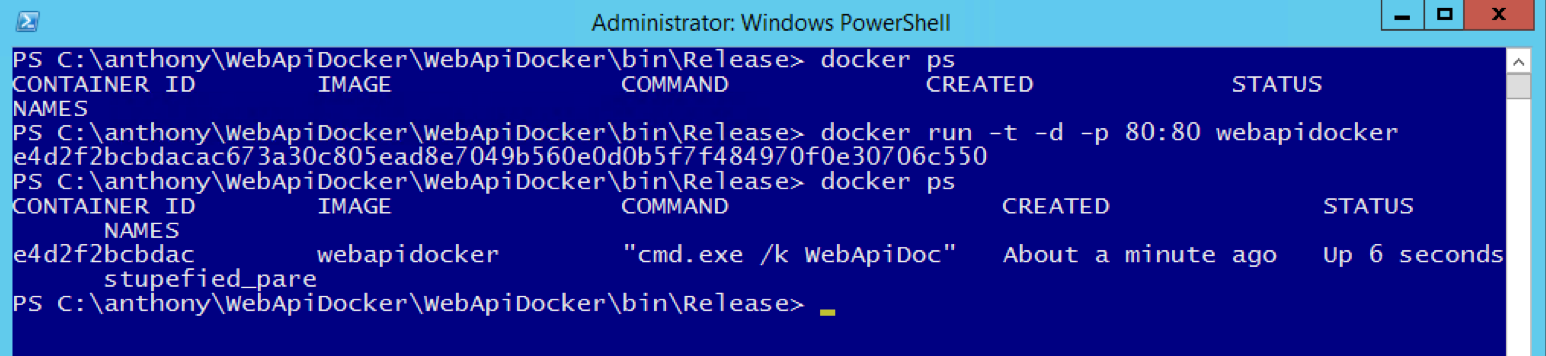
Now we can create a container and run it!
PS> docker run -d -p 80:80 webapidocker
Once the container is created, check its status by running docker ps:
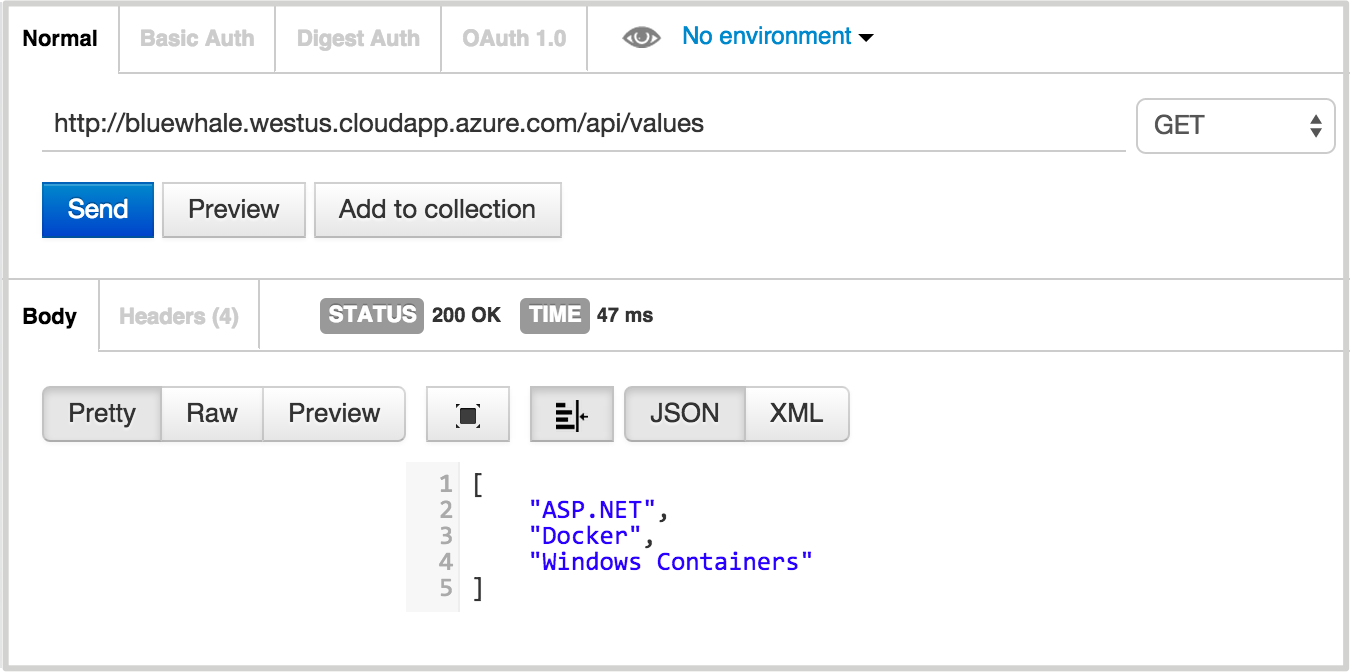
And if everything is working properly, we should be able to browse to the API on our Docker host at http://your-docker-host:80/api/values. Here's the result using Postman:
The source code for the project above can be found here.
When ASP.NET 5 and .NET Core were first announced, there was a lot of excitement over the ability to run ASP.NET in Docker containers on Linux.
But what about .NET 4.5 apps that only run on Windows? Well, they finally got some love with the introduction of containers support in Windows Server 2016 Technical Preview 3. Now we can run OWIN self-hosted apps in Docker containers on Windows.
While ASP.NET MVC 5 (not to be confused with MVC 6 on ASP.NET 5) cannot run without IIS, ASP.NET Web API and SignalR apps can (thanks to OWIN self hosting). In this article we'll go over how to create a self-hosted ASP.NET Web API app and run it in a Docker Windows Server Container.
Docker Host Setup and Configuration
If you don't already have a Docker host, check out my previous article to get one up and running.
Creating a Self-Hosted Web API Application
Now we'll create a sample OWIN self-hosted application. Skip to the next section if you already have one you want to use.
Start Visual Studio and create a new Console Application.
Open up the Package Manager Console and install Microsoft.AspNet.WebApi.OwinSelfHost from Nuget. This package adds ASP.NET Web API and the ability to self-host it using OWIN.
PM> Install-Package Microsoft.AspNet.WebApi.OwinSelfHost
Create a class file called Startup.cs and paste in this code:
using Owin;
using System.Web.Http;
namespace WebApiDocker
{
public class Startup
{
public void Configuration(IAppBuilder app)
{
HttpConfiguration config = new HttpConfiguration();
config.Routes.MapHttpRoute(
name: "DefaultApi",
routeTemplate: "api/{controller}/{id}",
defaults: new { id = RouteParameter.Optional }
);
app.UseWebApi(config);
}
}
}
And we'll add this code into Program.cs to bootstrap the OWIN host. Note that we're using http://*:80/ so that application binds to all network interfaces:
using Microsoft.Owin.Hosting;
using System;
namespace WebApiDocker
{
class Program
{
static void Main(string[] args)
{
string baseAddress = "http://*:80/";
using (WebApp.Start<Startup>(url: baseAddress))
{
Thread.Sleep(Timeout.Infinite);
}
}
}
}
The last step is to add a Web API controller. Create a file called ValuesController.cs:
using System.Collections.Generic;
using System.Web.Http;
namespace WebApiDocker
{
public class ValuesController : ApiController
{
public IEnumerable<string> Get()
{
return new List<string> { "ASP.NET", "Docker", "Windows Containers" };
}
}
}
Now run the application and browse to http://localhost/api/values, it should display the results of the API call. (Because the application binds to all network interfaces, you may need to start the app as an administrator)
Creating the Dockerfile
We are now ready to build a Docker image for our application. The first step is to create a Dockerfile that specifies how the image should be built.
Create a text file called Dockerfile with the following contents:
FROM windowsservercore
ADD . /app
WORKDIR /app
ENTRYPOINT ["cmd.exe", "/k", "WebApiDocker.exe"]
This tells Docker to:
- Use
windowsservercoreas the base image - Copy the contents of the current folder into a folder in the image called
/app - Use
/appas the working directory when the container is run - Start
WebApiDocker.exe(or whatever your main application is called) when the container is run
We need to add this file to the project and set it to "Copy Always". This copies the file to the output directory.
Now we can build the application in Release mode. After the build, check that the Dockerfile and all necessary files are in the output folder:
Building the Docker Image
Start a PowerShell prompt and change to the applications build output folder.
Build the Docker image (-t specifies a repository name):
PS> docker build -t webapidocker .
After the build completes, the image should appear when you run docker images:
Running a Container
Now we can create a container and run it!
PS> docker run -d -p 80:80 webapidocker
Once the container is created, check its status by running docker ps:
And if everything is working properly, we should be able to browse to the API on our Docker host at http://your-docker-host:80/api/values. Here's the result using Postman:
The source code for the project above can be found here.