
Walkthrough: Provisioning an Azure Windows Docker Host Using Visual Studio
Sunday, August 30, 2015
Windows Server 2016 Technical Preview 3 was released on August 19. The biggest new feature is the support for Windows Server Containers and the Docker engine.
Microsoft's documentation suggests several ways to get access to Windows Server 2016 TP3 and configure it for use with containers; but none of them talks about how to access the machines removely. Docker Machine would simplify this a lot but it doesn't look like it works with Windows Server yet.
I have found that the simplest way to get started is actually to provision an Azure VM using the Visual Studio Tools for Docker. The Visual Studio tooling really makes it simple to spin up and configure a VM. It'll automatically:
- Provision the server and related resources using an Azure Resource Manager (ARM) template
- Configure the server to run containers and the Docker daemon
- Generate and install certificates to access the machine remotely using the Docker client
- Open ports 2376 (Docker daemon) and 80 (to simplify deployment of our first web container)
In this article, we'll go through how to set up a Windows Docker host in Azure using Visual Studio and connect to it using the Docker CLI to run some basic commands.
Setting Up Visual Studio
To set this up, you'll need to install:
- Visual Studio 2015 (Community, Professional, Enterprise)
- ASP.NET and Web Tools 2015 (Beta6)
- Visual Studio Tools for Docker (current version is August Preview) - This will also install the Docker command line interface.
Provisioning the Windows Server Containers Host
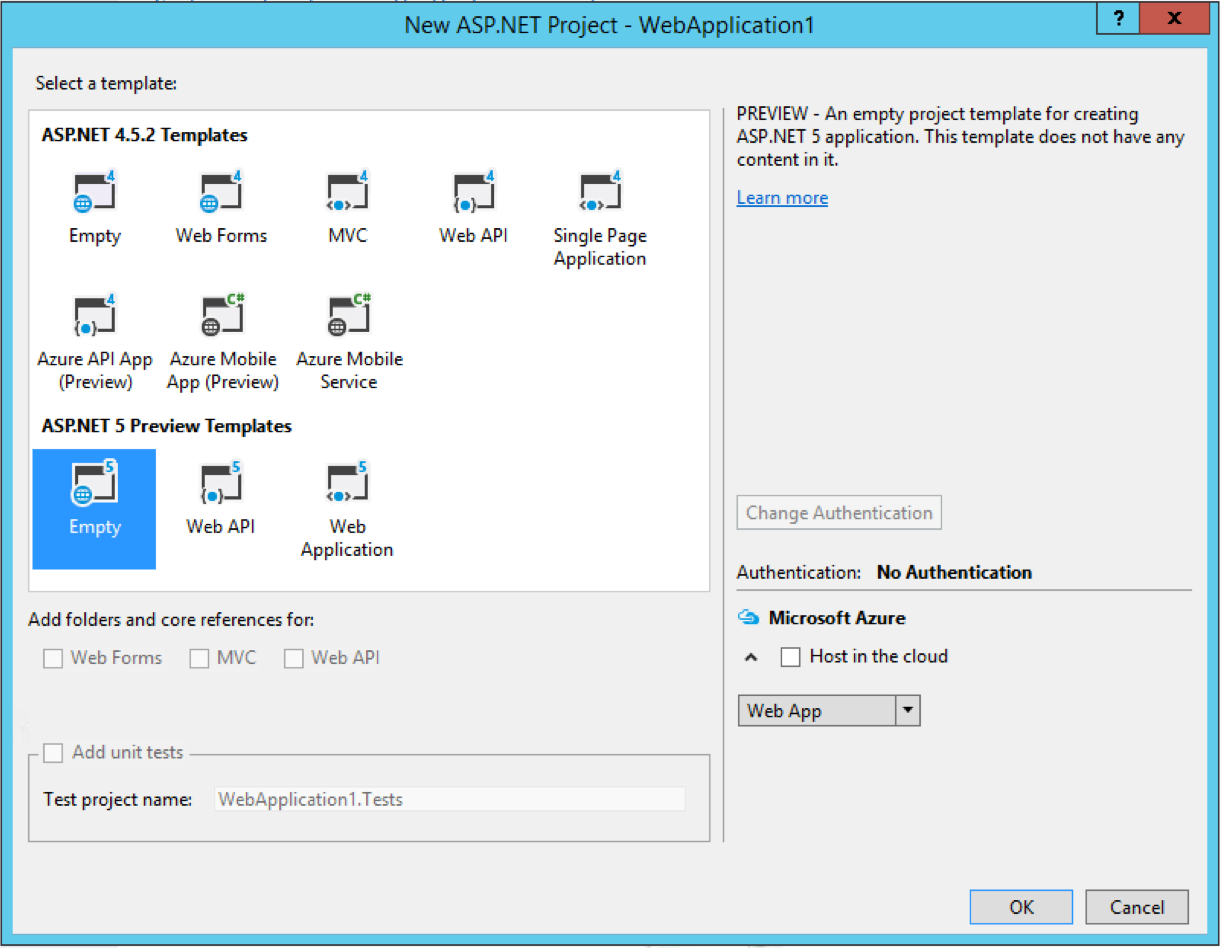
To get to the tooling for creating the server, we have to be in Visual Studio with an ASP.NET 5 project opened. So open an existing ASP.NET 5 project or create one using the New Project dialog. We won't be using this project, so just select an empty ASP.NET 5 project.
After the solution is loaded, right-click on the ASP.NET 5 project and select "Publish". In the dialog box, select "Docker Container". Log into your Azure account if you haven't already. Click the "New" button (if the button is missing, you might have forgotten to install ASP.NET and Web Tools 2015 (Beta6)). This dialog will appear:
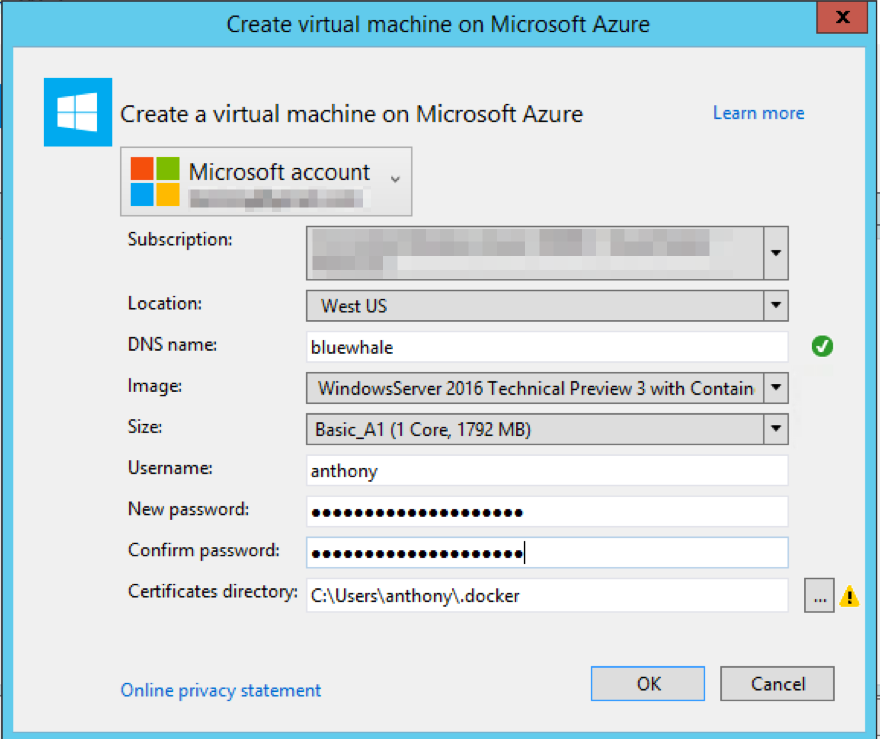
Fill in a server name, and select "WindowsServer 2016 Technical Preview 3 with Containers" (yeah, that's really what it's called) as the VM image, and Standard A1 or higher as the VM size. A0 works too, but it's pretty slow at building Docker images. Fill in the other information and click OK. This will provision the VM and configure everything so that you can connect to the Docker host remotely.
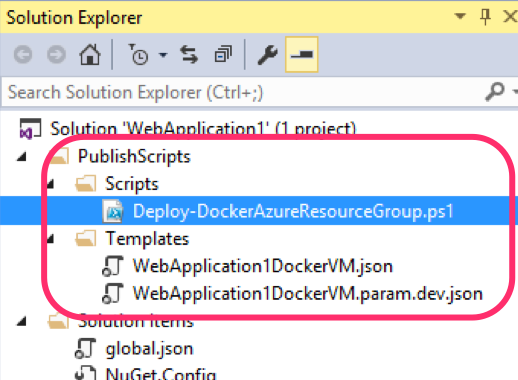
If you're curious about how the tool does its magic, it's really no magic at all. It's simply running a PowerShell script. Take a look at the script and ARM template in the PublishScripts folder. It's simply creating some certificates and passing them as parameters to the New-AzureResourceGroup commandlet to deploy the ARM template. Looking in the ARM template, you'll also find a reference to a custom script on GitHub that is run on the VM to complete the configuration.
Using the Docker CLI
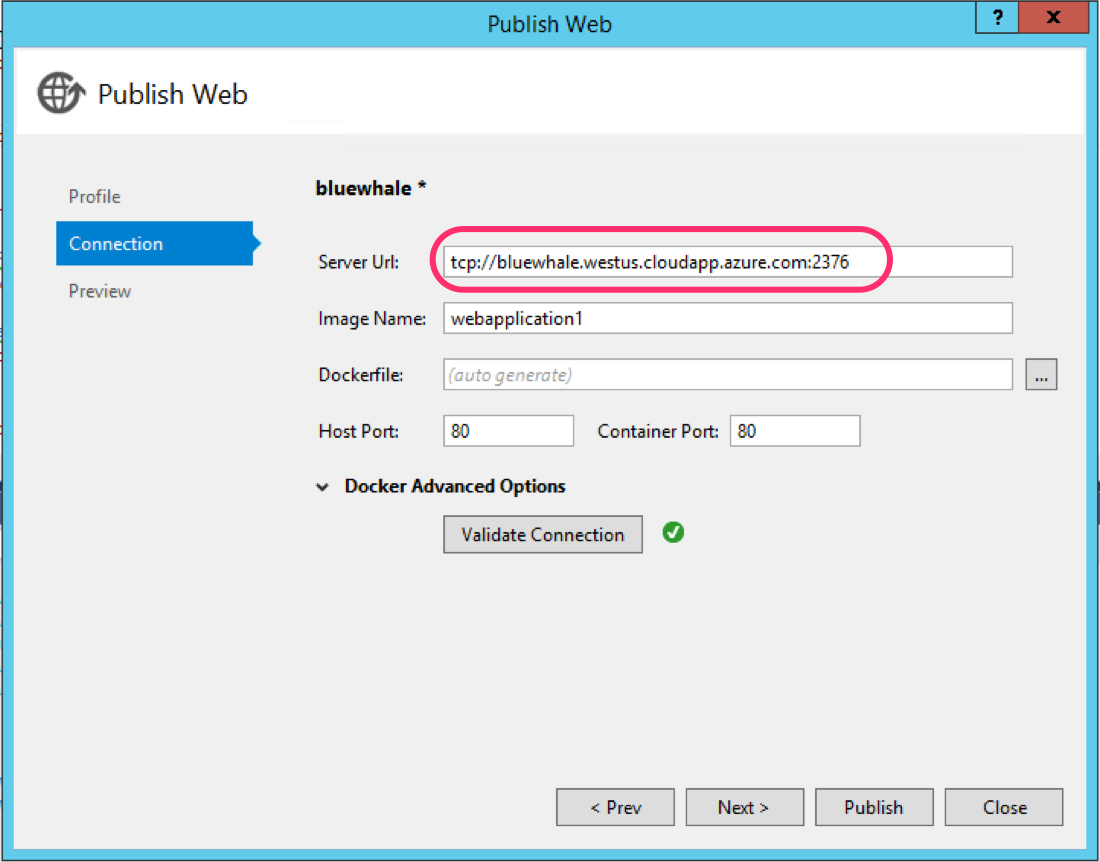
To get the name of the Docker host, right click on the project and select Publish again. Copy the Server Url.
Now let's check if the Windows Docker host has been provisioned properly by connecting to it via the Docker command line interface in a PowerShell prompt.
First, let's connect to the host and list its Docker images (using your own server URL, of course).
PS> docker --tlsverify -H "tcp://bluewhale.westus.cloudapp.azure.com:2376" images
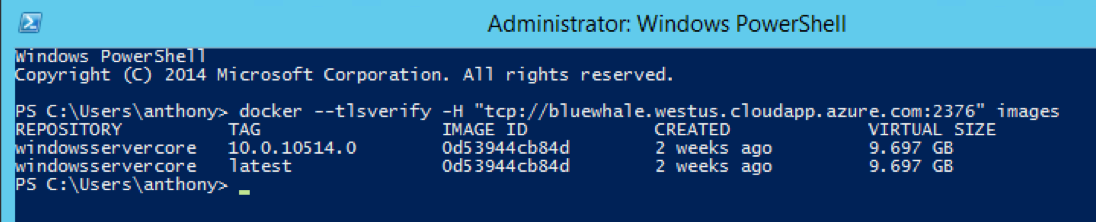
It should list the windowsservercore image (it is listed twice because it has two different tags). This image is the base for any Windows Docker images we'll be building.
Instead of specifying the --tlsverify flag and the host (-H) on every command, we can set a couple of environment variables and Docker will use those as defaults for the rest of this PowerShell session.
PS> $env:DOCKER_HOST = "tcp://bluewhale.westus.cloudapp.azure.com:2376"
PS> $env:DOCKER_TLS_VERIFY = 1
Now we can run the above images command like this:
PS> docker images
Let's create and run a temporary container from the windowsservercore image. Here we'll run the container and start a command prompt. We use the --rm flag to tell Docker not to save the container. The -it flag (or -i -t) allows us to interact with the command prompt:
PS> docker run --rm -it windowsservercore cmd
The command prompt inside the container will appear. We can poke around using standard DOS commands. One of the things I want to do is run a .NET application inside one of these containers, so let's see what version of .NET is available (using techniques from this StackOverflow question):
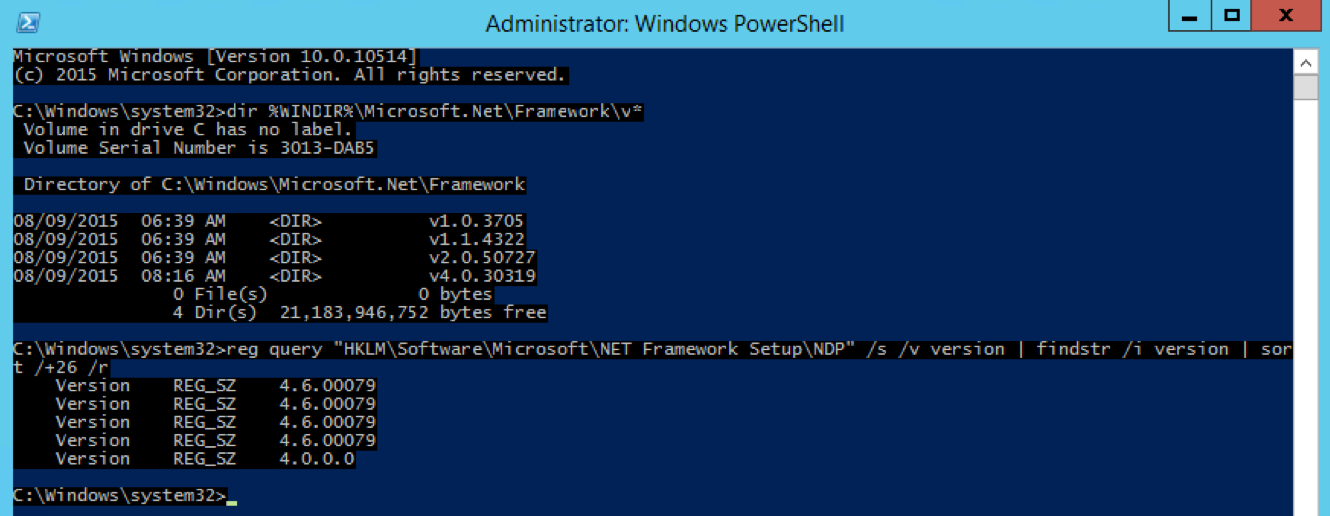
Looks like version 4.6 of the .NET Framework is available. In the next article I'll go over how to run an OWIN self-hosted ASP.NET Web API application inside a Windows Docker container.
Windows Server 2016 Technical Preview 3 was released on August 19. The biggest new feature is the support for Windows Server Containers and the Docker engine.
Microsoft's documentation suggests several ways to get access to Windows Server 2016 TP3 and configure it for use with containers; but none of them talks about how to access the machines removely. Docker Machine would simplify this a lot but it doesn't look like it works with Windows Server yet.
I have found that the simplest way to get started is actually to provision an Azure VM using the Visual Studio Tools for Docker. The Visual Studio tooling really makes it simple to spin up and configure a VM. It'll automatically:
- Provision the server and related resources using an Azure Resource Manager (ARM) template
- Configure the server to run containers and the Docker daemon
- Generate and install certificates to access the machine remotely using the Docker client
- Open ports 2376 (Docker daemon) and 80 (to simplify deployment of our first web container)
In this article, we'll go through how to set up a Windows Docker host in Azure using Visual Studio and connect to it using the Docker CLI to run some basic commands.
Setting Up Visual Studio
To set this up, you'll need to install:
- Visual Studio 2015 (Community, Professional, Enterprise)
- ASP.NET and Web Tools 2015 (Beta6)
- Visual Studio Tools for Docker (current version is August Preview) - This will also install the Docker command line interface.
Provisioning the Windows Server Containers Host
To get to the tooling for creating the server, we have to be in Visual Studio with an ASP.NET 5 project opened. So open an existing ASP.NET 5 project or create one using the New Project dialog. We won't be using this project, so just select an empty ASP.NET 5 project.
After the solution is loaded, right-click on the ASP.NET 5 project and select "Publish". In the dialog box, select "Docker Container". Log into your Azure account if you haven't already. Click the "New" button (if the button is missing, you might have forgotten to install ASP.NET and Web Tools 2015 (Beta6)). This dialog will appear:
Fill in a server name, and select "WindowsServer 2016 Technical Preview 3 with Containers" (yeah, that's really what it's called) as the VM image, and Standard A1 or higher as the VM size. A0 works too, but it's pretty slow at building Docker images. Fill in the other information and click OK. This will provision the VM and configure everything so that you can connect to the Docker host remotely.
If you're curious about how the tool does its magic, it's really no magic at all. It's simply running a PowerShell script. Take a look at the script and ARM template in the PublishScripts folder. It's simply creating some certificates and passing them as parameters to the New-AzureResourceGroup commandlet to deploy the ARM template. Looking in the ARM template, you'll also find a reference to a custom script on GitHub that is run on the VM to complete the configuration.
Using the Docker CLI
To get the name of the Docker host, right click on the project and select Publish again. Copy the Server Url.
Now let's check if the Windows Docker host has been provisioned properly by connecting to it via the Docker command line interface in a PowerShell prompt.
First, let's connect to the host and list its Docker images (using your own server URL, of course).
PS> docker --tlsverify -H "tcp://bluewhale.westus.cloudapp.azure.com:2376" images
It should list the windowsservercore image (it is listed twice because it has two different tags). This image is the base for any Windows Docker images we'll be building.
Instead of specifying the --tlsverify flag and the host (-H) on every command, we can set a couple of environment variables and Docker will use those as defaults for the rest of this PowerShell session.
PS> $env:DOCKER_HOST = "tcp://bluewhale.westus.cloudapp.azure.com:2376"
PS> $env:DOCKER_TLS_VERIFY = 1
Now we can run the above images command like this:
PS> docker images
Let's create and run a temporary container from the windowsservercore image. Here we'll run the container and start a command prompt. We use the --rm flag to tell Docker not to save the container. The -it flag (or -i -t) allows us to interact with the command prompt:
PS> docker run --rm -it windowsservercore cmd
The command prompt inside the container will appear. We can poke around using standard DOS commands. One of the things I want to do is run a .NET application inside one of these containers, so let's see what version of .NET is available (using techniques from this StackOverflow question):
Looks like version 4.6 of the .NET Framework is available. In the next article I'll go over how to run an OWIN self-hosted ASP.NET Web API application inside a Windows Docker container.