
Contributing to a GitHub Project Using Just a Web Browser (and Visual Studio Online “Monaco”)
Monday, June 23, 2014
Last fall, Microsoft released its Visual Studio Online editor, codenamed “Monaco”. It’s a powerful browser-based development experience built into Windows Azure Web Sites. It contains syntax highlighting for many languages, and first class language services for JavaScript and TypeScript. Monaco also includes Git integration and full access to the command line, including access to msbuild, npm, and nuget.
Today I used the Visual Studio Online editor to work on an issue for the fantastic DefinitelyTyped project. DefinitelyTyped is a repository of TypeScript typings for many JavaScript libraries.
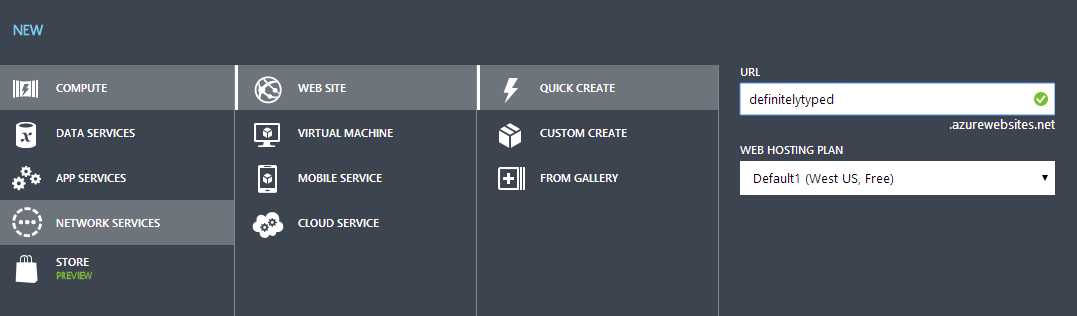
I had already forked the repository to my own GitHub account. I begin by logging into the Azure portal and creating a new web site…
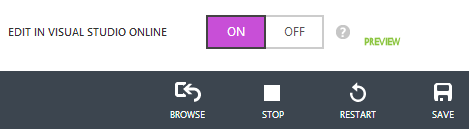
Then I go to the Configure tab of the web site and turned on Visual Studio Online…
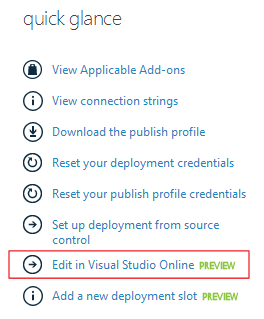
The editor is then accessible via the web site’s dashboard (it may take a few seconds to show up)…
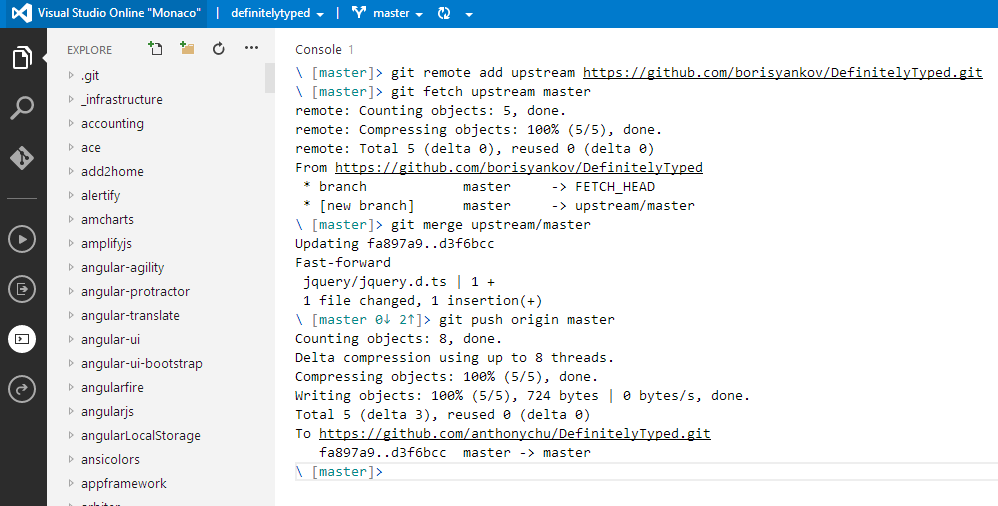
When the editor opens, I click on the Git tab and paste in the repository URL into the box. This clones the repository to the web site’s file system. It’s a good idea to set up a remote for the upstream repository and merge in any changes that may have be made to the original repository since it was forked. This is done by opening up the console and entering the relevant Git commands…
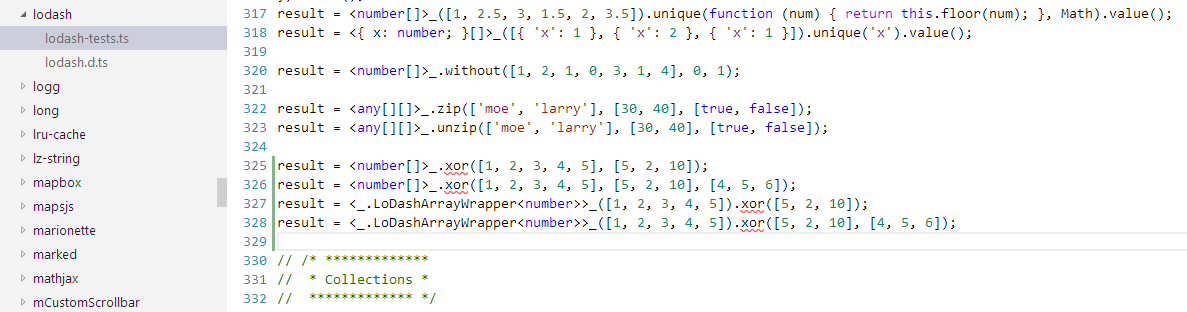
I then open the files I want to modify and they open up in the editor. Here I’m creating a few tests. Because Monaco contains the TypeScript language service, errors are highlighted on the lines I added because I haven’t written the implementations yet…
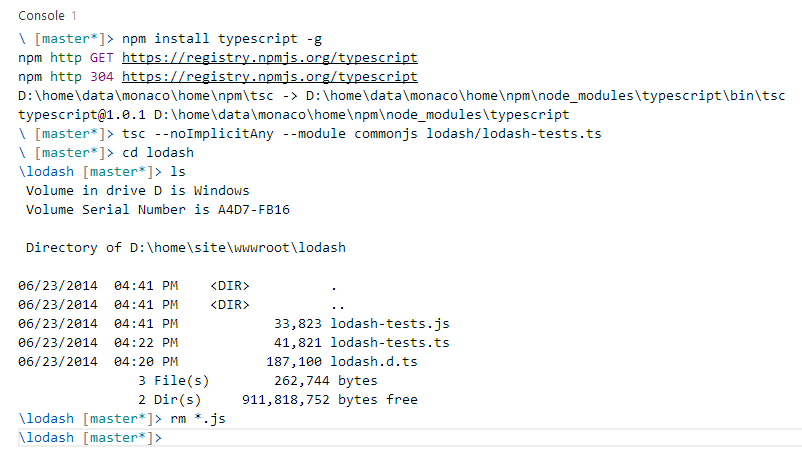
After I’ve made all my changes, the errors disappear. To make sure there really are no errors, I go back to the console and compile the test. Before I can do this, I need to install the TypeScript compiler. This can be done using the Node Package Manager (NPM). Then I can compile the test file I updated…
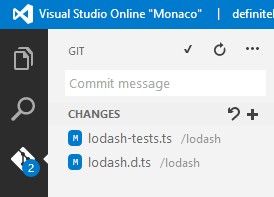
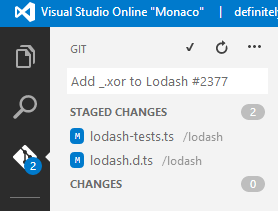
Now it’s time to commit the changes locally and push to GitHub. It can be done on the command line. Another way to commit is using the Git tab. It will show the changed files; click the plus icon to add them and type a commit message…
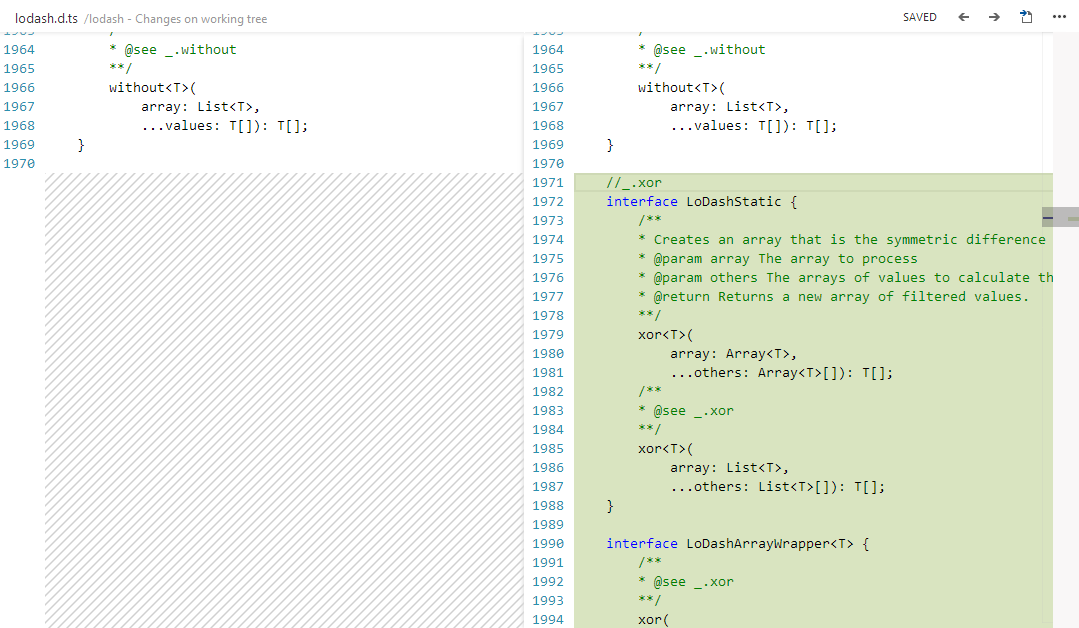
We can also see the changes in a diff editor…
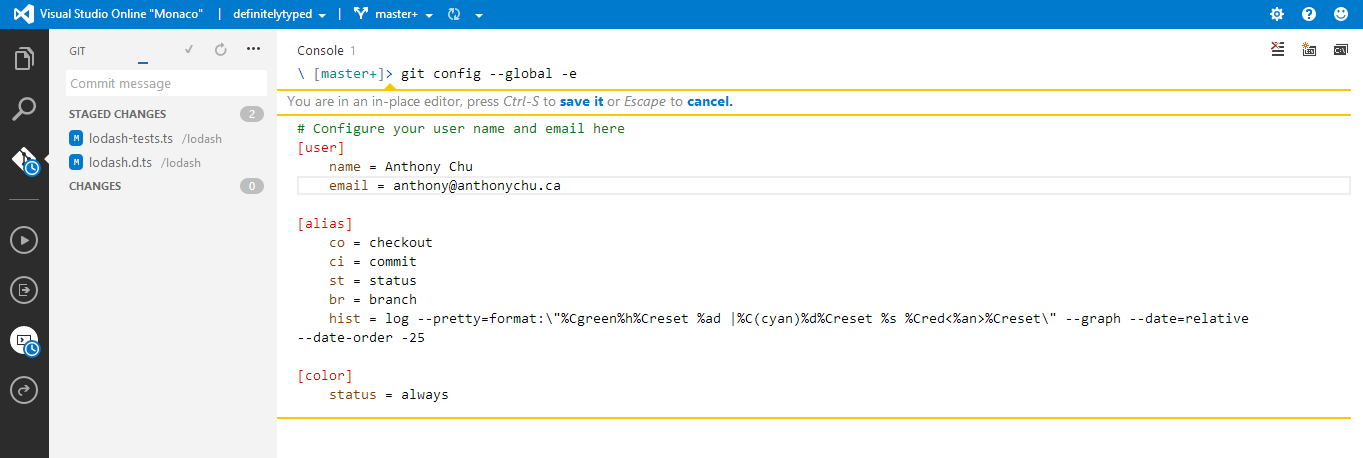
I then click the Commit button. I had not set up my Git config, so a nice inline editor pops up with the config file and I can edit it on the spot…
Now that the changes are committed to my local repository, the only thing remaining is to push it to GitHub. This is done by using the command line or clicking on the ellipses “...” and choosing “Push”. The only thing left is to log into GitHub pull request.
And that’s all there is to it… I’ve successfully made and tested a change to a GitHub repository, and submitted a pull request using nothing but a web browser!
Update – July 2, 2014
My pull request was accepted and the updated NuGet package with the changes has already been published!
Last fall, Microsoft released its Visual Studio Online editor, codenamed “Monaco”. It’s a powerful browser-based development experience built into Windows Azure Web Sites. It contains syntax highlighting for many languages, and first class language services for JavaScript and TypeScript. Monaco also includes Git integration and full access to the command line, including access to msbuild, npm, and nuget.
Today I used the Visual Studio Online editor to work on an issue for the fantastic DefinitelyTyped project. DefinitelyTyped is a repository of TypeScript typings for many JavaScript libraries.
I had already forked the repository to my own GitHub account. I begin by logging into the Azure portal and creating a new web site…
Then I go to the Configure tab of the web site and turned on Visual Studio Online…
The editor is then accessible via the web site’s dashboard (it may take a few seconds to show up)…
When the editor opens, I click on the Git tab and paste in the repository URL into the box. This clones the repository to the web site’s file system. It’s a good idea to set up a remote for the upstream repository and merge in any changes that may have be made to the original repository since it was forked. This is done by opening up the console and entering the relevant Git commands…
I then open the files I want to modify and they open up in the editor. Here I’m creating a few tests. Because Monaco contains the TypeScript language service, errors are highlighted on the lines I added because I haven’t written the implementations yet…
After I’ve made all my changes, the errors disappear. To make sure there really are no errors, I go back to the console and compile the test. Before I can do this, I need to install the TypeScript compiler. This can be done using the Node Package Manager (NPM). Then I can compile the test file I updated…
Now it’s time to commit the changes locally and push to GitHub. It can be done on the command line. Another way to commit is using the Git tab. It will show the changed files; click the plus icon to add them and type a commit message…
We can also see the changes in a diff editor…
I then click the Commit button. I had not set up my Git config, so a nice inline editor pops up with the config file and I can edit it on the spot…
Now that the changes are committed to my local repository, the only thing remaining is to push it to GitHub. This is done by using the command line or clicking on the ellipses “...” and choosing “Push”. The only thing left is to log into GitHub pull request.
And that’s all there is to it… I’ve successfully made and tested a change to a GitHub repository, and submitted a pull request using nothing but a web browser!
Update – July 2, 2014
My pull request was accepted and the updated NuGet package with the changes has already been published!