
Deploying an ASP.NET Core App on an Azure Service Fabric Party Cluster
Sunday, March 27, 2016
The easiest way to try out Azure Service Fabric is by using the free "party clusters". Party clusters were created by the Service Fabric team as a low-friction way to try out the service for free, without having to provision any infrastructure.
The Service Fabric SDK (currently at v1.5.175) makes it pretty simple to create an ASP.NET Core application and deploy it locally; but the application needs a couple of tweaks before it will run on a remote cluster.
In this article we'll deploy an ASP.NET Core application to a Service Fabric party cluster.
Creating the ASP.NET Core App
Before we begin, make sure the Service Fabric SDK is installed.
Open Visual Studio as an administrator. Some interactions with the local cluster requires elevated privileges.
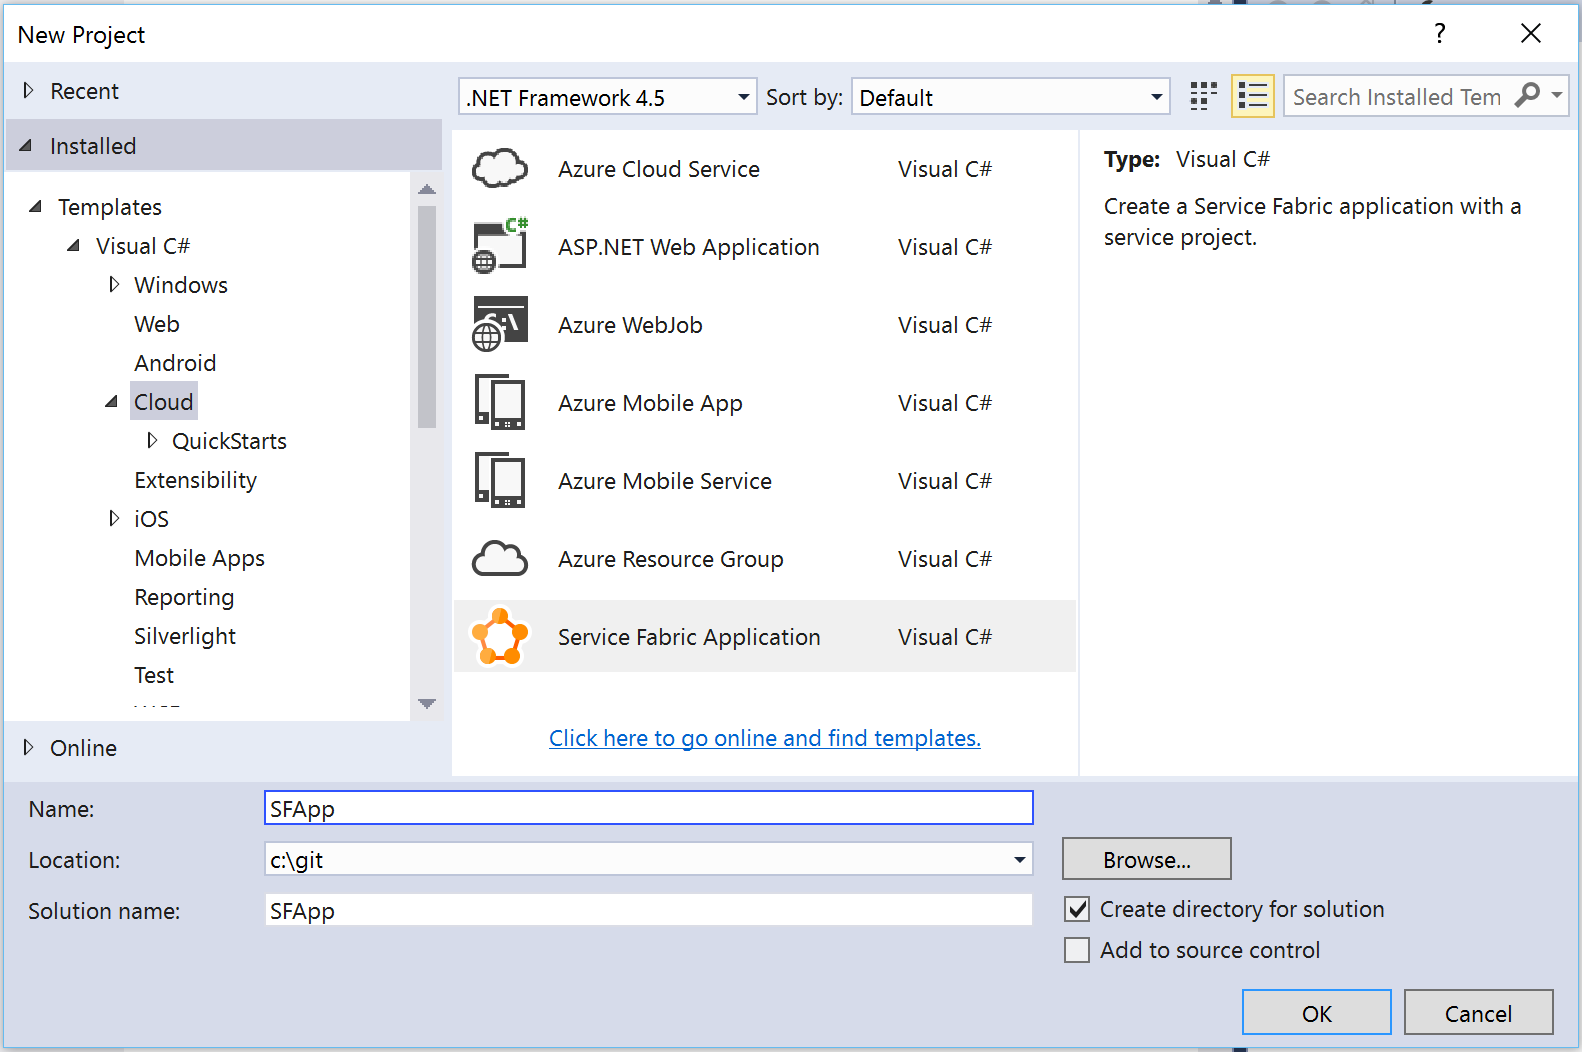
Create a new Service Fabric Application. Currently there are some issues with long path names, so give the solution and project a short name; and put it as close to the root as possible.
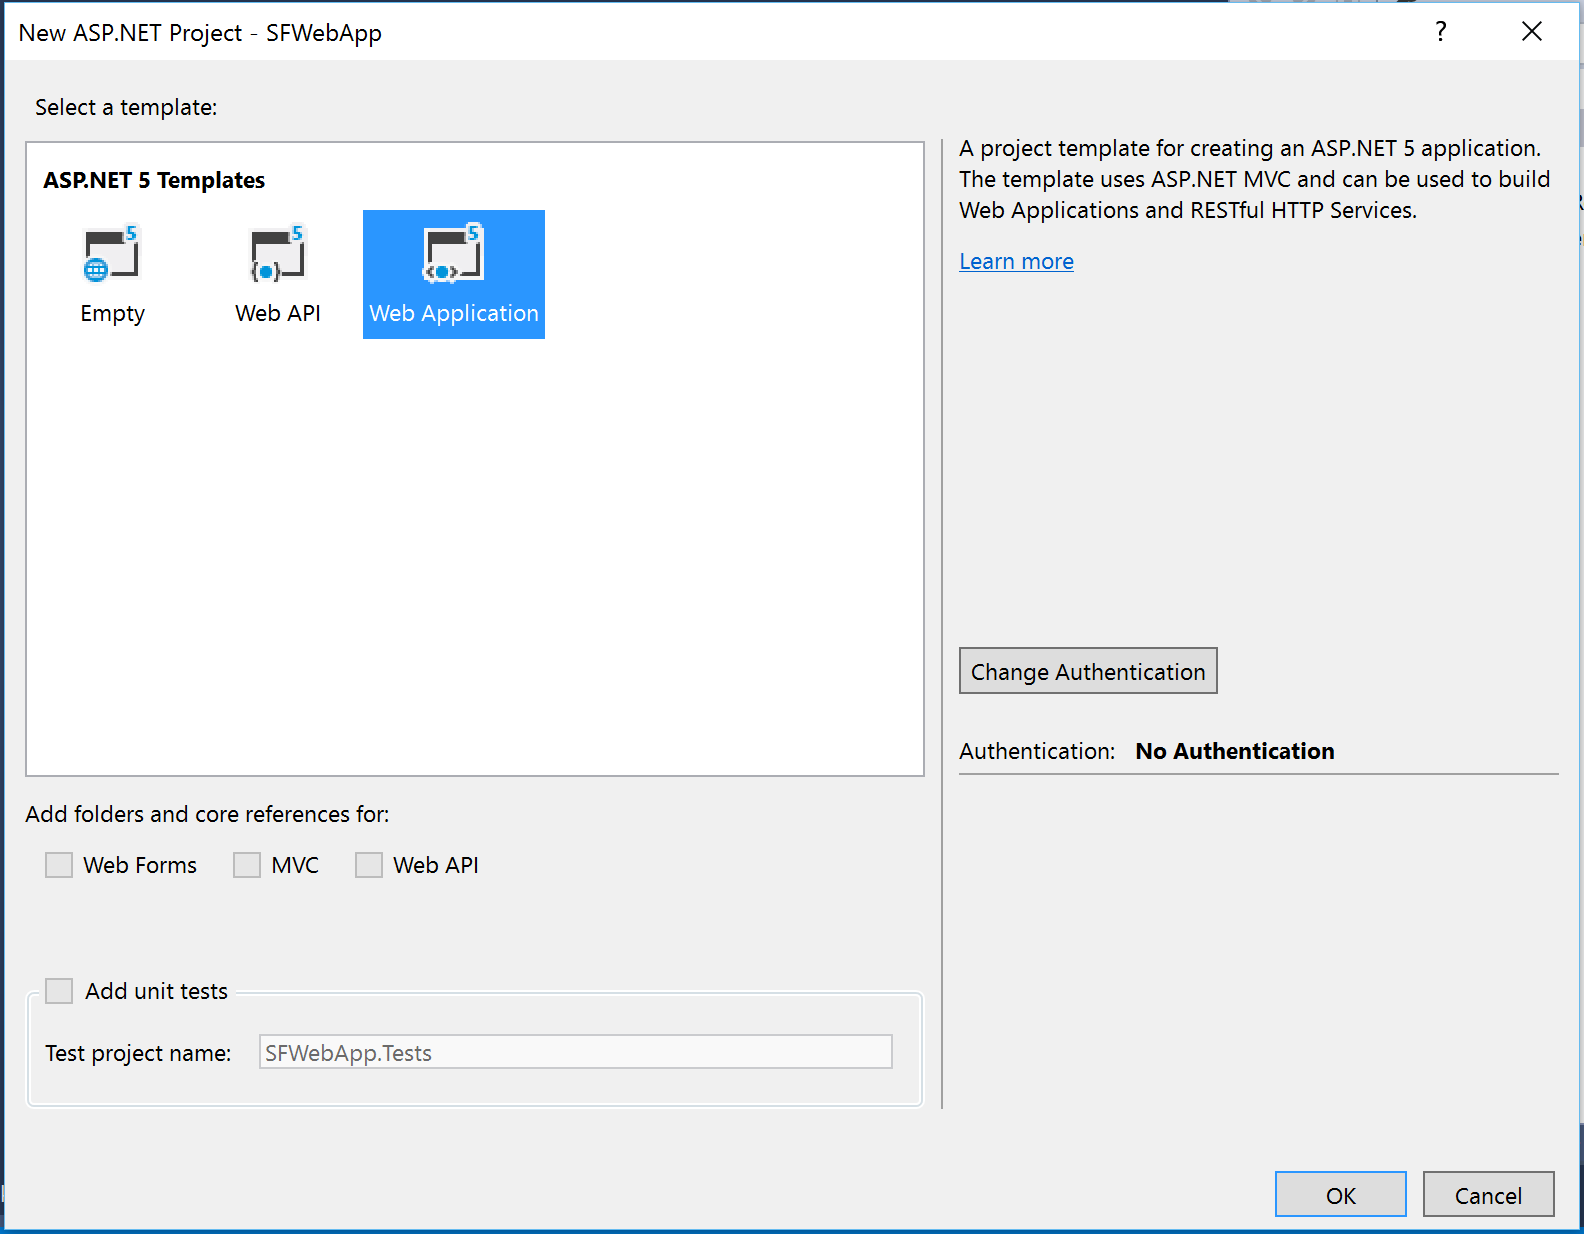
After clicking OK, another dialog prompts us to add a service to our application. Chose "ASP.NET 5" (presumably this will be renamed really soon to ASP.NET Core). Also give it a short name, then click OK.

The "One ASP.NET" dialog appears with just the ASP.NET Core templates. We'll build a Web Application with No Authenication.
The Service Fabric Application and ASP.NET Core projects will now be created.
Running the App on the Local Cluster
We should now be ready to deploy this application to our local cluster. With the Service Fabric Application project set as the startup project, start the application in Debug mode. This will build and deploy the application package to the local cluster. If the local cluster hasn't been initialized, this step can take a few minutes.
After that's all done, a browser should open to localhost:8080 and we should see our ASP.NET site.
Now we're ready to deploy the application to a party cluster.
Deploying the App to a Party Cluster
Joining a Party Cluster
The first thing we'll do is head over to http://tryazureservicefabric.eastus.cloudapp.azure.com to join a cluster. Select one that has a decent amount of time left and not too many applications running on it. We should receive an email with the connection information almost instantly.
Modifying the Manifests
Now we have to make a few tweaks to the manifest files in order to deploy the application to the cluster.
In the ASP.NET Core project, open PackageRoot/ServiceManifest.xml. In the file, there's an <Endpoint> node with an HTTP port of 8080. Change it to the application port shown in the party cluster invitation email. In our case, it's 8505.
<Endpoint Name="SFWebAppTypeEndpoint" Protocol="http" Type="Input" Port="8505" />
Now we'll make some changes to the Service Fabric Application's manifest located at ApplicationPackageRoot/ApplicationManifest.xml.
There should be a <DefaultServices> node. This element was inserted by the SDK when the application was deployed to the local cluster. Inside there should be a <StatelessService> element. Add a attribute called InstanceCount with the value of [SFWebApp_InstanceCount]. This tells Service Fabric how many instances of the service to create, and to get the value from a parameter called SFWebApp_InstanceCount.
We'll also add a default value for the parameter to the <Parameters> section in the manifest. The entire application manifest should now look something like this:
<?xml version="1.0" encoding="utf-8"?>
<ApplicationManifest xmlns:xsd="http://www.w3.org/2001/XMLSchema"
    xmlns:xsi="http://www.w3.org/2001/XMLSchema-instance"
    ApplicationTypeName="SFAppType" ApplicationTypeVersion="1.0.0"
    xmlns="http://schemas.microsoft.com/2011/01/fabric">
  <Parameters>
    <Parameter Name="SFWebApp_InstanceCount" DefaultValue="1" />
  </Parameters>
  <ServiceManifestImport>
    <ServiceManifestRef ServiceManifestName="SFWebApp" ServiceManifestVersion="1.0.0" />
  </ServiceManifestImport>
  <DefaultServices>
    <Service Name="SFWebAppService">
      <StatelessService ServiceTypeName="SFWebAppType" InstanceCount="[SFWebApp_InstanceCount]">
        <SingletonPartition />
      </StatelessService>
    </Service>
  </DefaultServices>
</ApplicationManifest>
The default services we specified tell Service Fabric what services to instantiate when it runs the application. This is optional, as we can also use PowerShell commands to do the same thing.
We're defaulting the number of instances to 1 because we can only have 1 instance of our web app running on our local cluster. This is because all nodes are running on one physical machine, so if more than 1 instance of the app is started, they would compete for the same port on the physical machine and fail.
Deploying to the Remote Cluster
Now we're almost ready to deploy to the party cluster.
In the Service Fabric Application, change the parameter for a cloud deployment to -1. We do this by modifying ApplicationParameters/Cloud.xml:
<?xml version="1.0" encoding="utf-8"?>
<Application xmlns:xsd="http://www.w3.org/2001/XMLSchema"
    xmlns:xsi="http://www.w3.org/2001/XMLSchema-instance" Name="fabric:/SFApp"
    xmlns="http://schemas.microsoft.com/2011/01/fabric">
  <Parameters>
    <Parameter Name="SFWebApp_InstanceCount" Value="-1" />
  </Parameters>
</Application>
And we also have to add the party cluster URL to our publishing profile located at PublishProfiles/Cloud.xml. For example:
<?xml version="1.0" encoding="utf-8"?>
<PublishProfile xmlns="http://schemas.microsoft.com/2015/05/fabrictools">
  <ClusterConnectionParameters ConnectionEndpoint="party20818.westus.cloudapp.azure.com:19000" />
  <ApplicationParameterFile Path="..\ApplicationParameters\Cloud.xml" />
</PublishProfile>
And finally, we can right-click on the Service Fabric Application in Visual Studio and select Publish:
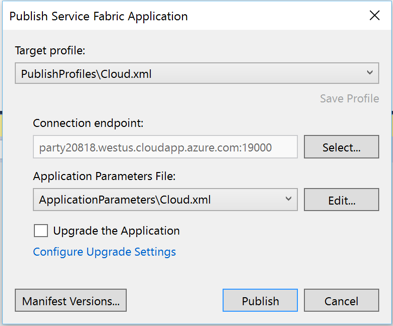
Publish using the Cloud profile and wait a few minutes for the application to be deployed.
Opening the App on the Party Cluster
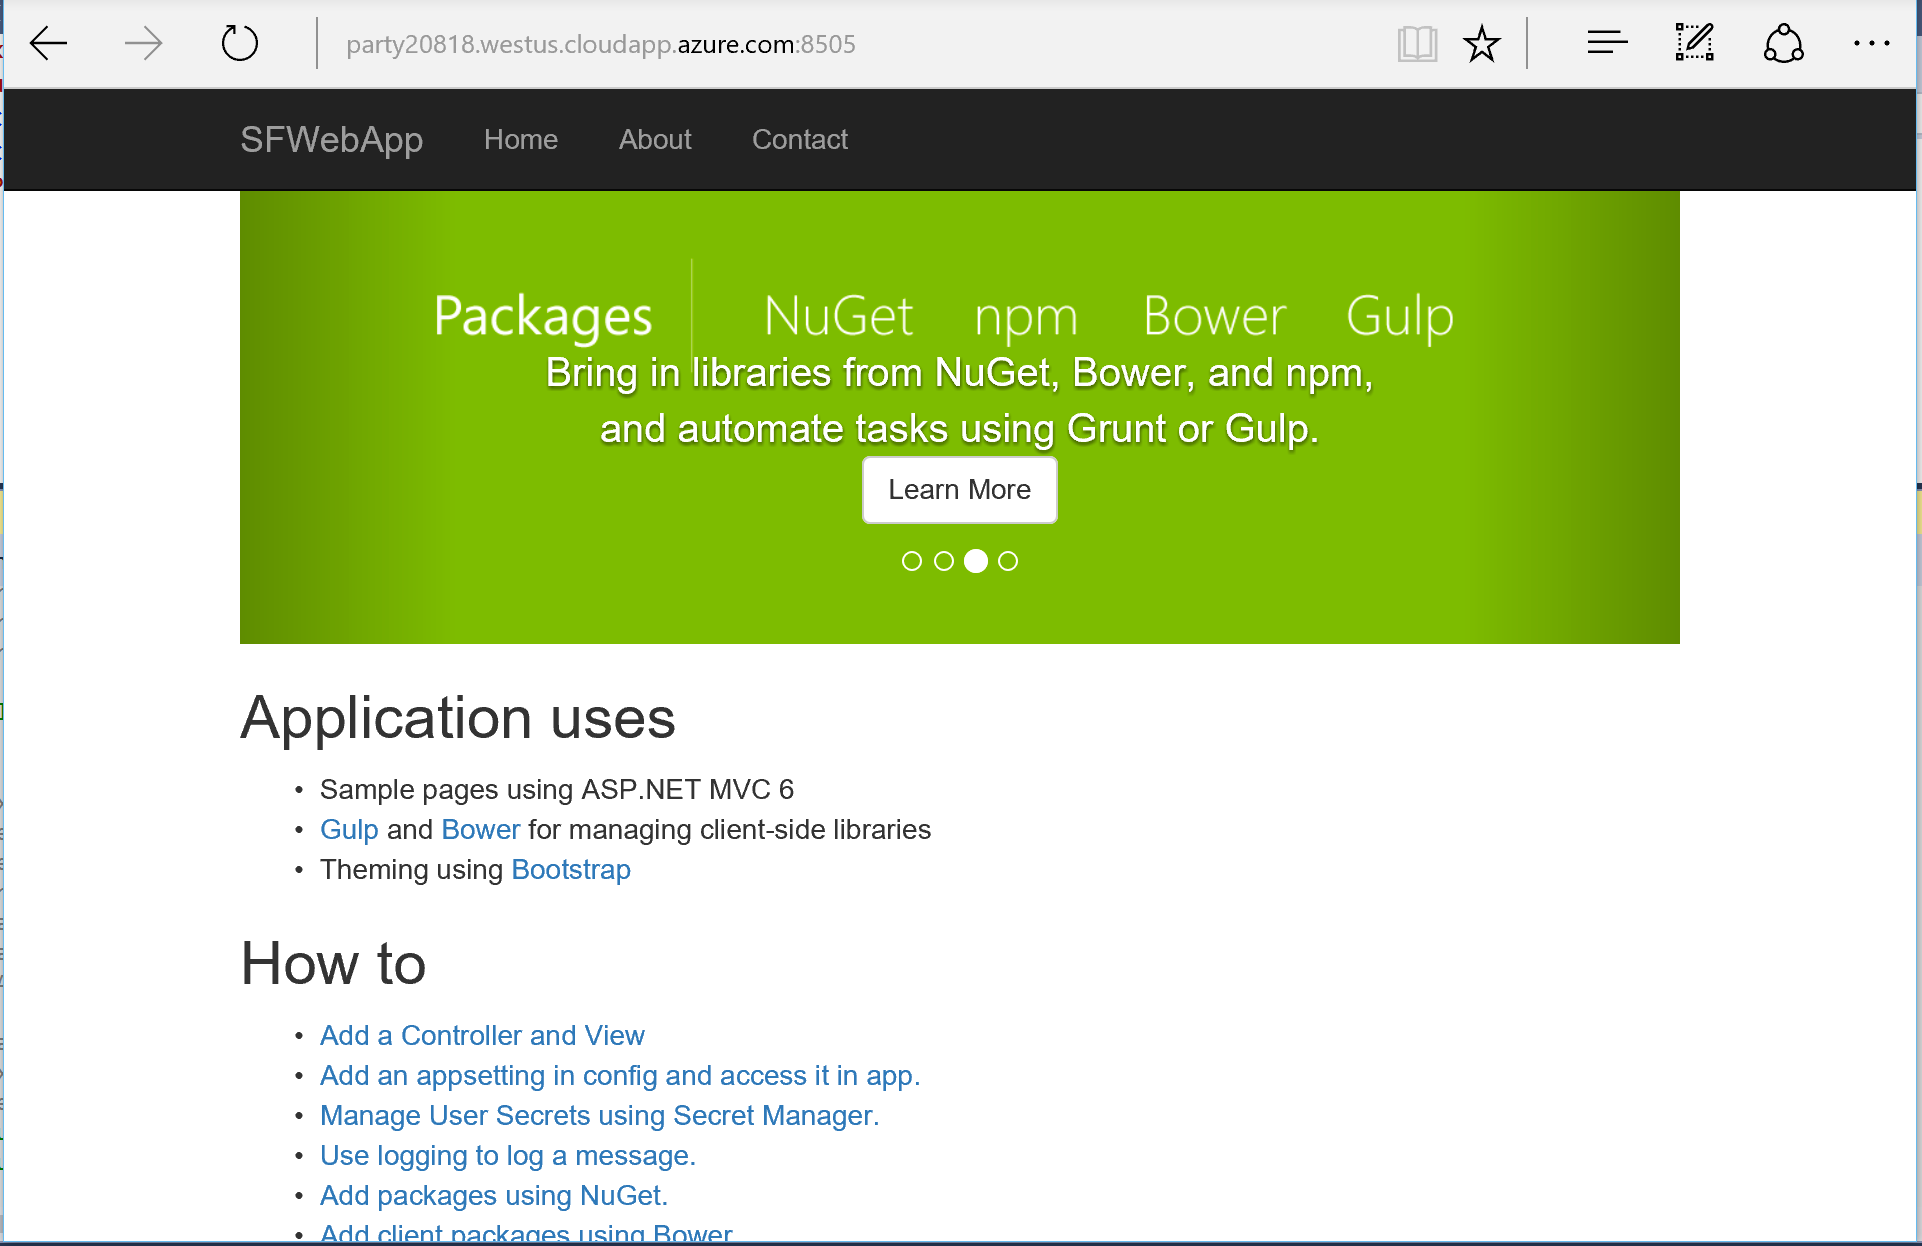
Now we can point our browser to the app's URL (in our case it was http://party20818.westus.cloudapp.azure.com:8505/) and our site should appear.
Checking the App's Heath with Service Fabric Explorer
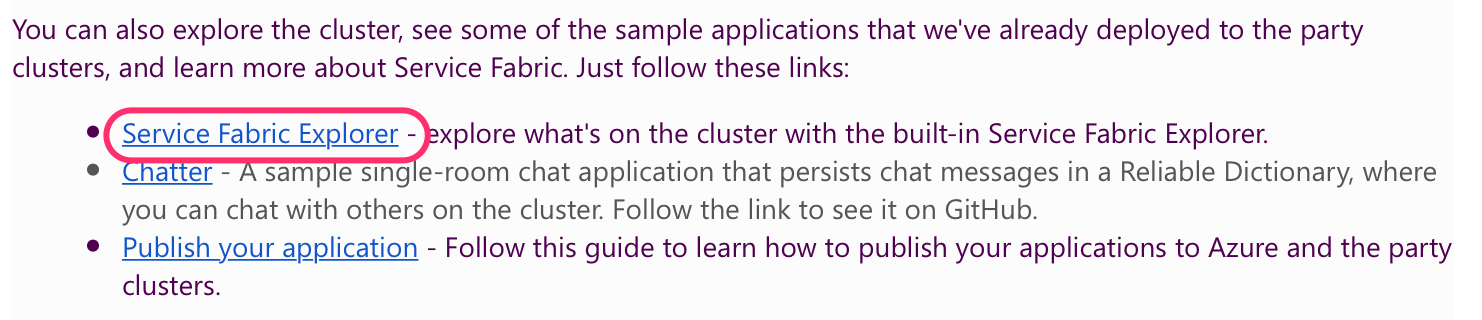
In our invitation email, there should be a link to open the cluster's Service Fabric Explorer:
We should be able to find our application and see that it's running on all 5 nodes in the cluster. There's a load balancer in front of the cluster that is distributing traffic to all the nodes. We'll take a look at how the load balancer works in a future article.

Source Code
Full source code can be found here:
https://github.com/anthonychu/aspnetcore-service-fabric
The easiest way to try out Azure Service Fabric is by using the free "party clusters". Party clusters were created by the Service Fabric team as a low-friction way to try out the service for free, without having to provision any infrastructure.
The Service Fabric SDK (currently at v1.5.175) makes it pretty simple to create an ASP.NET Core application and deploy it locally; but the application needs a couple of tweaks before it will run on a remote cluster.
In this article we'll deploy an ASP.NET Core application to a Service Fabric party cluster.
Creating the ASP.NET Core App
Before we begin, make sure the Service Fabric SDK is installed.
Open Visual Studio as an administrator. Some interactions with the local cluster requires elevated privileges.
Create a new Service Fabric Application. Currently there are some issues with long path names, so give the solution and project a short name; and put it as close to the root as possible.
After clicking OK, another dialog prompts us to add a service to our application. Chose "ASP.NET 5" (presumably this will be renamed really soon to ASP.NET Core). Also give it a short name, then click OK.
The "One ASP.NET" dialog appears with just the ASP.NET Core templates. We'll build a Web Application with No Authenication.
The Service Fabric Application and ASP.NET Core projects will now be created.
Running the App on the Local Cluster
We should now be ready to deploy this application to our local cluster. With the Service Fabric Application project set as the startup project, start the application in Debug mode. This will build and deploy the application package to the local cluster. If the local cluster hasn't been initialized, this step can take a few minutes.
After that's all done, a browser should open to localhost:8080 and we should see our ASP.NET site.
Now we're ready to deploy the application to a party cluster.
Deploying the App to a Party Cluster
Joining a Party Cluster
The first thing we'll do is head over to http://tryazureservicefabric.eastus.cloudapp.azure.com to join a cluster. Select one that has a decent amount of time left and not too many applications running on it. We should receive an email with the connection information almost instantly.
Modifying the Manifests
Now we have to make a few tweaks to the manifest files in order to deploy the application to the cluster.
In the ASP.NET Core project, open PackageRoot/ServiceManifest.xml. In the file, there's an <Endpoint> node with an HTTP port of 8080. Change it to the application port shown in the party cluster invitation email. In our case, it's 8505.
<Endpoint Name="SFWebAppTypeEndpoint" Protocol="http" Type="Input" Port="8505" />
Now we'll make some changes to the Service Fabric Application's manifest located at ApplicationPackageRoot/ApplicationManifest.xml.
There should be a <DefaultServices> node. This element was inserted by the SDK when the application was deployed to the local cluster. Inside there should be a <StatelessService> element. Add a attribute called InstanceCount with the value of [SFWebApp_InstanceCount]. This tells Service Fabric how many instances of the service to create, and to get the value from a parameter called SFWebApp_InstanceCount.
We'll also add a default value for the parameter to the <Parameters> section in the manifest. The entire application manifest should now look something like this:
<?xml version="1.0" encoding="utf-8"?>
<ApplicationManifest xmlns:xsd="http://www.w3.org/2001/XMLSchema"
xmlns:xsi="http://www.w3.org/2001/XMLSchema-instance"
ApplicationTypeName="SFAppType" ApplicationTypeVersion="1.0.0"
xmlns="http://schemas.microsoft.com/2011/01/fabric">
<Parameters>
<Parameter Name="SFWebApp_InstanceCount" DefaultValue="1" />
</Parameters>
<ServiceManifestImport>
<ServiceManifestRef ServiceManifestName="SFWebApp" ServiceManifestVersion="1.0.0" />
</ServiceManifestImport>
<DefaultServices>
<Service Name="SFWebAppService">
<StatelessService ServiceTypeName="SFWebAppType" InstanceCount="[SFWebApp_InstanceCount]">
<SingletonPartition />
</StatelessService>
</Service>
</DefaultServices>
</ApplicationManifest>
The default services we specified tell Service Fabric what services to instantiate when it runs the application. This is optional, as we can also use PowerShell commands to do the same thing.
We're defaulting the number of instances to 1 because we can only have 1 instance of our web app running on our local cluster. This is because all nodes are running on one physical machine, so if more than 1 instance of the app is started, they would compete for the same port on the physical machine and fail.
Deploying to the Remote Cluster
Now we're almost ready to deploy to the party cluster.
In the Service Fabric Application, change the parameter for a cloud deployment to -1. We do this by modifying ApplicationParameters/Cloud.xml:
<?xml version="1.0" encoding="utf-8"?>
<Application xmlns:xsd="http://www.w3.org/2001/XMLSchema"
xmlns:xsi="http://www.w3.org/2001/XMLSchema-instance" Name="fabric:/SFApp"
xmlns="http://schemas.microsoft.com/2011/01/fabric">
<Parameters>
<Parameter Name="SFWebApp_InstanceCount" Value="-1" />
</Parameters>
</Application>
And we also have to add the party cluster URL to our publishing profile located at PublishProfiles/Cloud.xml. For example:
<?xml version="1.0" encoding="utf-8"?>
<PublishProfile xmlns="http://schemas.microsoft.com/2015/05/fabrictools">
<ClusterConnectionParameters ConnectionEndpoint="party20818.westus.cloudapp.azure.com:19000" />
<ApplicationParameterFile Path="..\ApplicationParameters\Cloud.xml" />
</PublishProfile>
And finally, we can right-click on the Service Fabric Application in Visual Studio and select Publish:
Publish using the Cloud profile and wait a few minutes for the application to be deployed.
Opening the App on the Party Cluster
Now we can point our browser to the app's URL (in our case it was http://party20818.westus.cloudapp.azure.com:8505/) and our site should appear.
Checking the App's Heath with Service Fabric Explorer
In our invitation email, there should be a link to open the cluster's Service Fabric Explorer:
We should be able to find our application and see that it's running on all 5 nodes in the cluster. There's a load balancer in front of the cluster that is distributing traffic to all the nodes. We'll take a look at how the load balancer works in a future article.
Source Code
Full source code can be found here: https://github.com/anthonychu/aspnetcore-service-fabric