Replacing MongoDB with Azure DocumentDB in a Node Application
Thursday, August 18, 2016
In March at the Build Conference, Microsoft announced MongoDB wire protocol support in DocumentDB. This means we can take existing applications that connect to MongoDB and run them on DocumentDB instead, using the same native MongoDB drivers. In this article we'll take a random Node/MongoDB sample app from the web and connect it to DocumentDB.
Why DocumentDB
DocumentDB is Azure's NoSQL database-as-a-service. Here are some of its advantages:
- Fully managed - no VMs or database servers to manage, automatic backups
- Highly available (99.99% uptime SLA)
- Elastically scalable - scale storage and throughput up and down in seconds with no downtime
- Super fast - 99% of reads/writes are guaranteed to be under 15ms
There are vendors that offer MongoDB as a service, but they are simply managing MongoDB in VMs for you. Now that DocumentDB supports the MongoDB protocol, it's effectively the first fully-managed, elastically-scalable MongoDB service.
Creating a DocumentDB account with MongoDB support
In the Azure Portal, click New, Data + Storage, then DocumentDB - Protocol Support for MongoDB.

It'll take about a minute to create the DocumentDB account.
Open up the DocumentDB account in the Azure Portal and open its Connection String blade. Take note of the connection string.

Configure and run the Node.js application
The Node application that we'll be using is a Todo App by scotch-io. Clone it and run npm install.
$ git clone https://github.com/scotch-io/node-todo.git
$ cd node-todo
$ npm install
There is only one configuration value that we have to change. Open up config/database.js and change the localUrl to the Azure DocumentDB connection string.
module.exports = {
    localUrl: 'mongodb://anthony-docdb:ACCESSKEY@anthony-docdb.documents.azure.com:10250/?ssl=true'
};
Now we're ready to run the app.
$ node server.js
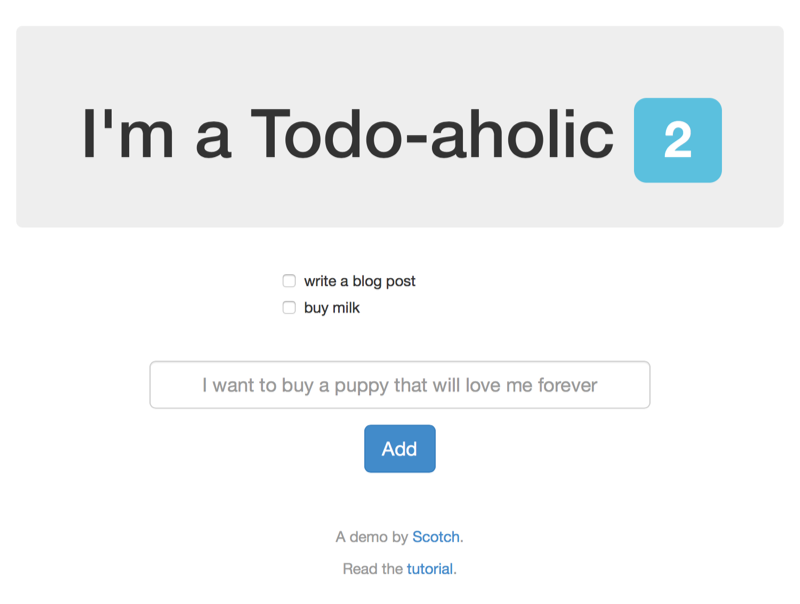
Open the browser to http://localhost:8080/ and add/remove some todos!

How it works
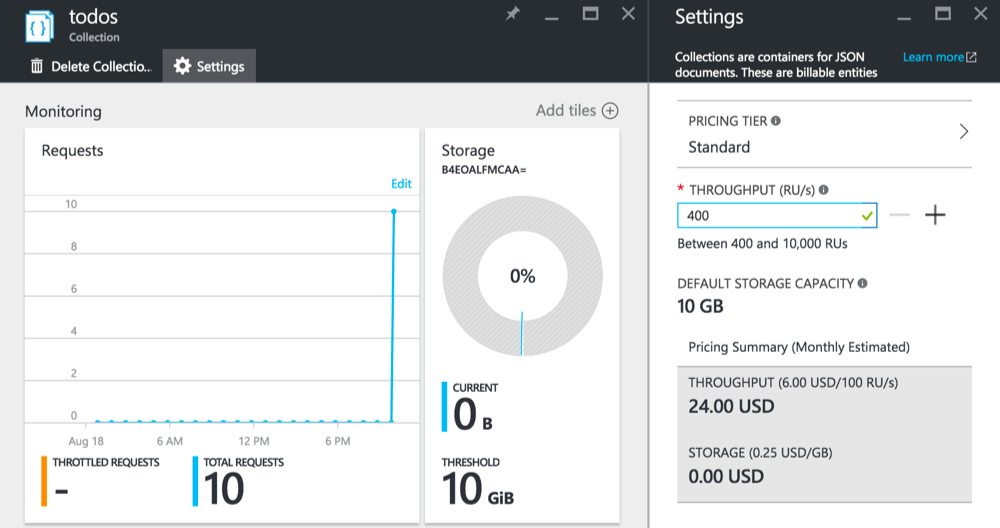
When the app first runs and sends a request to the database, a new database named admin is created in the DocumentDB account. Inside, we'll find a collection created by the application called todos.
By default, the collection is provisioned with a throughput of 1000 Request Units (RUs). We can change this by going to the Settings blade of the collection. Scaling actions take effect almost immediately and there's no downtime.

Changing the database name
If we don't want the database to be created with the default name of admin, we simply have to append the name we want to use to the connection string. For instance, if we want the database to be called todos, add it to the end of the connection string like this:
MongoDB://anthony-docdb:ACCESSKEY@anthony-docdb.documents.azure.com:10250/todos?ssl=true
Supported operations
Pretty much all CRUD operations are supported. For more information on compatibility details, check out this article.
In March at the Build Conference, Microsoft announced MongoDB wire protocol support in DocumentDB. This means we can take existing applications that connect to MongoDB and run them on DocumentDB instead, using the same native MongoDB drivers. In this article we'll take a random Node/MongoDB sample app from the web and connect it to DocumentDB.
Why DocumentDB
DocumentDB is Azure's NoSQL database-as-a-service. Here are some of its advantages:
- Fully managed - no VMs or database servers to manage, automatic backups
- Highly available (99.99% uptime SLA)
- Elastically scalable - scale storage and throughput up and down in seconds with no downtime
- Super fast - 99% of reads/writes are guaranteed to be under 15ms
There are vendors that offer MongoDB as a service, but they are simply managing MongoDB in VMs for you. Now that DocumentDB supports the MongoDB protocol, it's effectively the first fully-managed, elastically-scalable MongoDB service.
Creating a DocumentDB account with MongoDB support
In the Azure Portal, click New, Data + Storage, then DocumentDB - Protocol Support for MongoDB.

It'll take about a minute to create the DocumentDB account.
Open up the DocumentDB account in the Azure Portal and open its Connection String blade. Take note of the connection string.

Configure and run the Node.js application
The Node application that we'll be using is a Todo App by scotch-io. Clone it and run npm install.
$ git clone https://github.com/scotch-io/node-todo.git
$ cd node-todo
$ npm install
There is only one configuration value that we have to change. Open up config/database.js and change the localUrl to the Azure DocumentDB connection string.
module.exports = {
localUrl: 'mongodb://anthony-docdb:ACCESSKEY@anthony-docdb.documents.azure.com:10250/?ssl=true'
};
Now we're ready to run the app.
$ node server.js
Open the browser to http://localhost:8080/ and add/remove some todos!

How it works
When the app first runs and sends a request to the database, a new database named admin is created in the DocumentDB account. Inside, we'll find a collection created by the application called todos.
By default, the collection is provisioned with a throughput of 1000 Request Units (RUs). We can change this by going to the Settings blade of the collection. Scaling actions take effect almost immediately and there's no downtime.

Changing the database name
If we don't want the database to be created with the default name of admin, we simply have to append the name we want to use to the connection string. For instance, if we want the database to be called todos, add it to the end of the connection string like this:
MongoDB://anthony-docdb:ACCESSKEY@anthony-docdb.documents.azure.com:10250/todos?ssl=true
Supported operations
Pretty much all CRUD operations are supported. For more information on compatibility details, check out this article.
