Running Scheduled Executables in Azure Functions
Wednesday, April 6, 2016
One of the many big announcements at Build 2016 was Azure Functions. It's Microsoft's entry into the serverless architecture space and their answer to Amazon Lambda.
With Azure Functions, we can deploy little units of code that are run on-demand or via an already large variety of triggers. We are only billed for resources consumed during code execution and scaling is all handled for us.
Today we'll look at how we can run existing Windows console applications on a scheduler in Azure Functions.
Overview
At all companies I've worked at, there have been machines or VMs whose sole job is to host console applications triggered by Windows Scheduler. Those machines are usually sitting around doing nothing but we're paying for them.
With the introduction of Azure Functions, we can now run these workloads in Azure and only pay for resources they consume when they're running. And the best part is there is no code change required to run these applications!
The Console App
For this sample, we'll just create the simplest Hello World console application. I'm not sure why I'm even including the source code here...
using System;

namespace AzureFunctionsConsole
{
    class Program
    {
        static void Main(string[] args)
        {
            Console.WriteLine("Hello World!");
        }
    }
}
Create a Function App
We'll create a Function App in the Azure Portal:

Upload Console App as a Function
Now we can upload our console app as a Function.
Because Function Apps are just a special version of Azure Web Apps, all the usual suspects for deploying our code is there, such as WebDeploy, Git, FTP, etc. Today, we'll simply upload our code using the SCM (Kudu) web interface that comes with every Web App.
Now that our function is created, we can open up the app's Kudu portal. We can do this by adding .scm to the Function App's domain name. For instance, if the Function App's located at myfunctions.azurewebsites.net, its Kudu portal can be accessed at myfunctions.scm.azurewebsites.net. It is secured with the same credentials as the main Azure Portal.
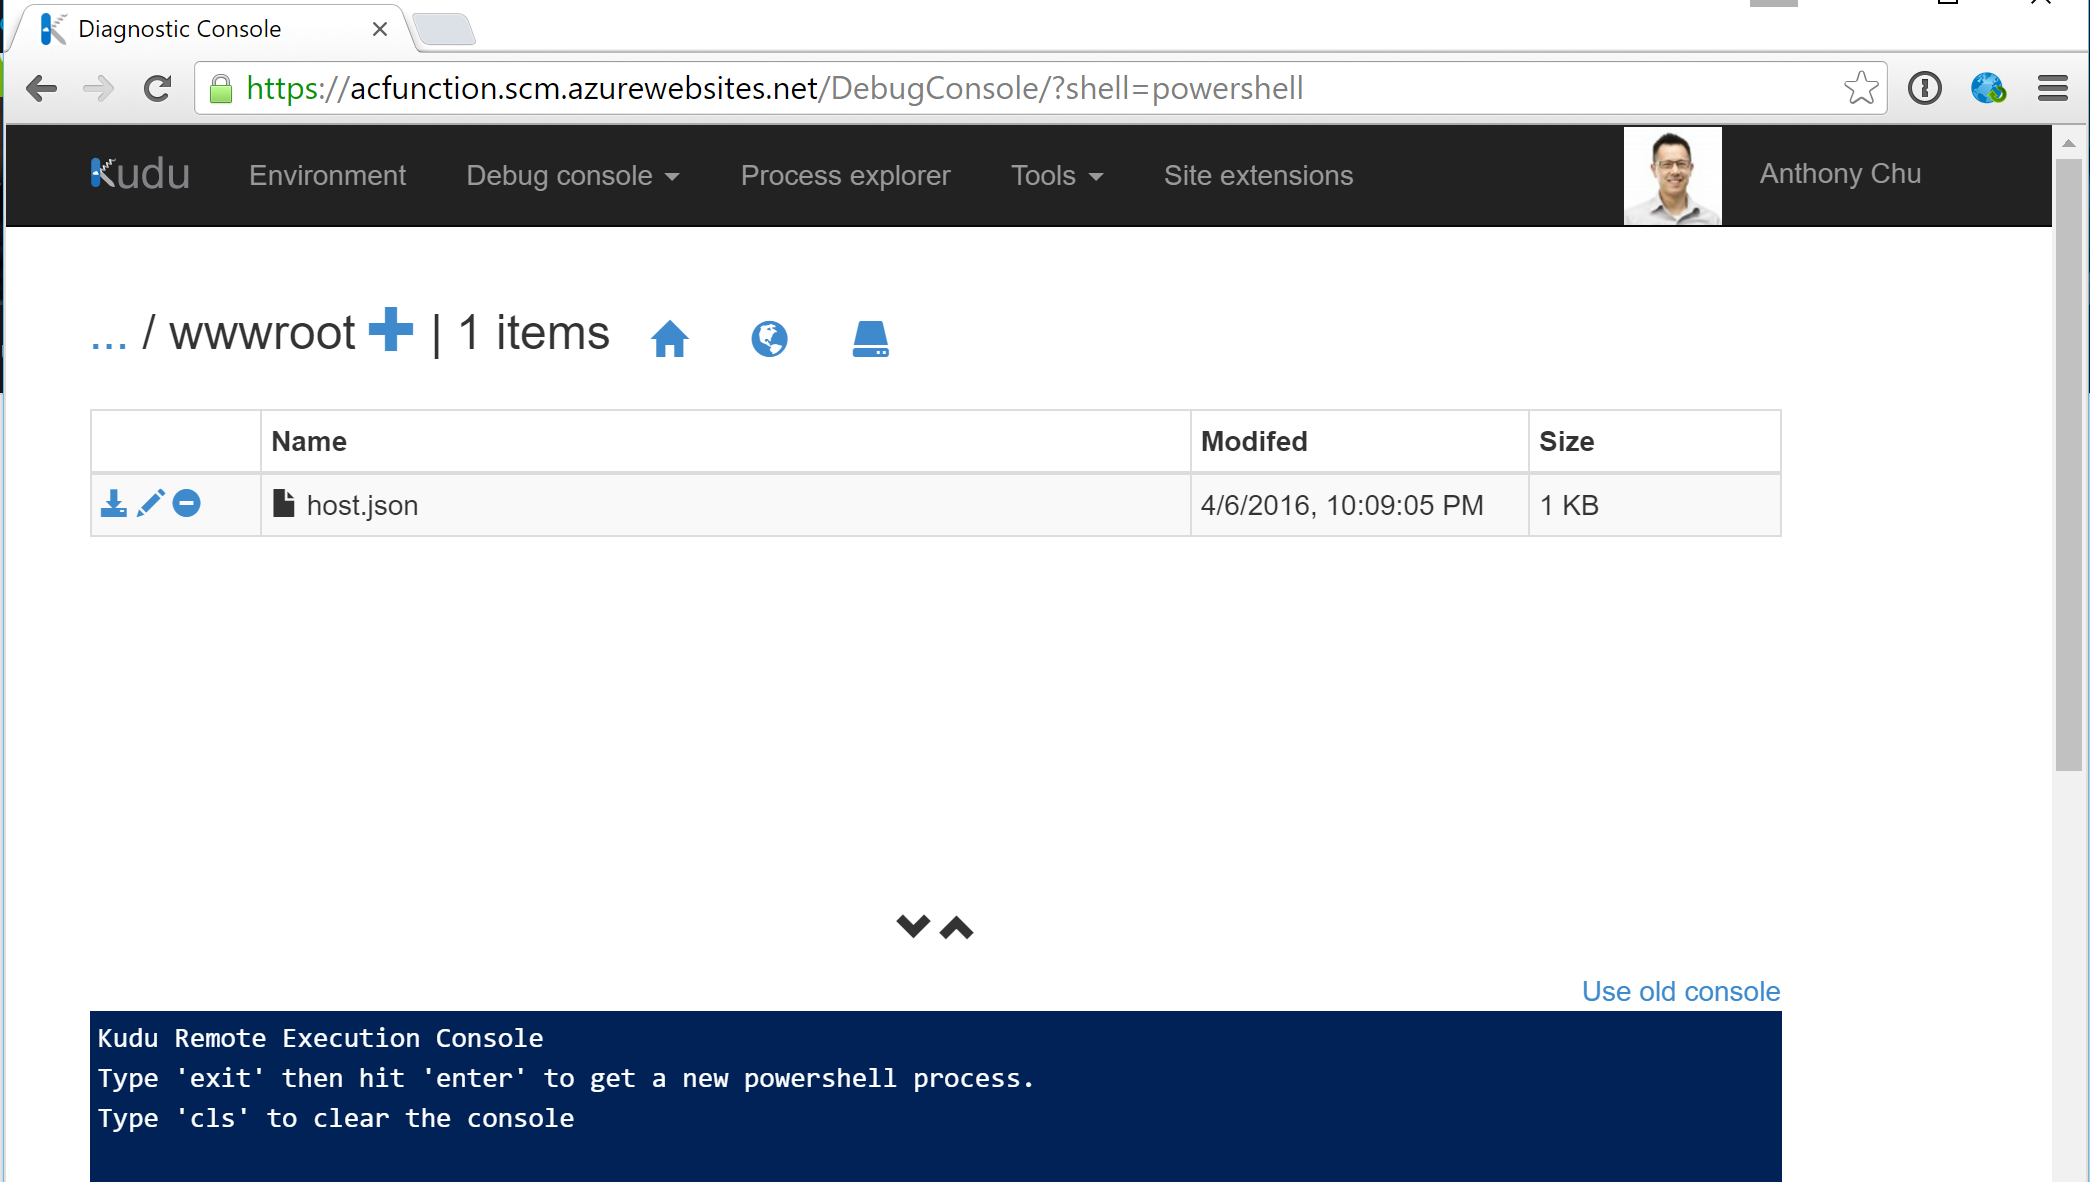
Click on the "Debug console" menu and select "PowerShell". This will open up a nifty PowerShell console plus a file explorer. Navigate to D:\home\site\wwwroot.

A Function is simply a folder with a function.json file and our code/application inside. We'll click the "+" button and create a folder.
Inside the new folder, upload our console app by dragging and dropping it from Windows Explorer into the files explorer section of the page. Include any DLLs and config files that it needs.
Next, we'll create a PowerShell script named run.ps1 and upload it to the folder. This is the function itself. Inside we'll just have one line that calls our executable:
.\AzureFunctionsConsole.exe
Lastly, we'll create a file named function.json with the following content and upload it to the folder. This file is what turns our code (in this case, the PowerShell script) into a Function:
{
  "bindings": [
    {
      "type": "timerTrigger",
      "direction": "in",
      "schedule": "*/15 * * * * *",
      "runOnStartup": false
    }
  ]
}
Here we're creating a timer trigger that executes every 15 seconds, specified using a cron expression. There are many other triggers that we can use.
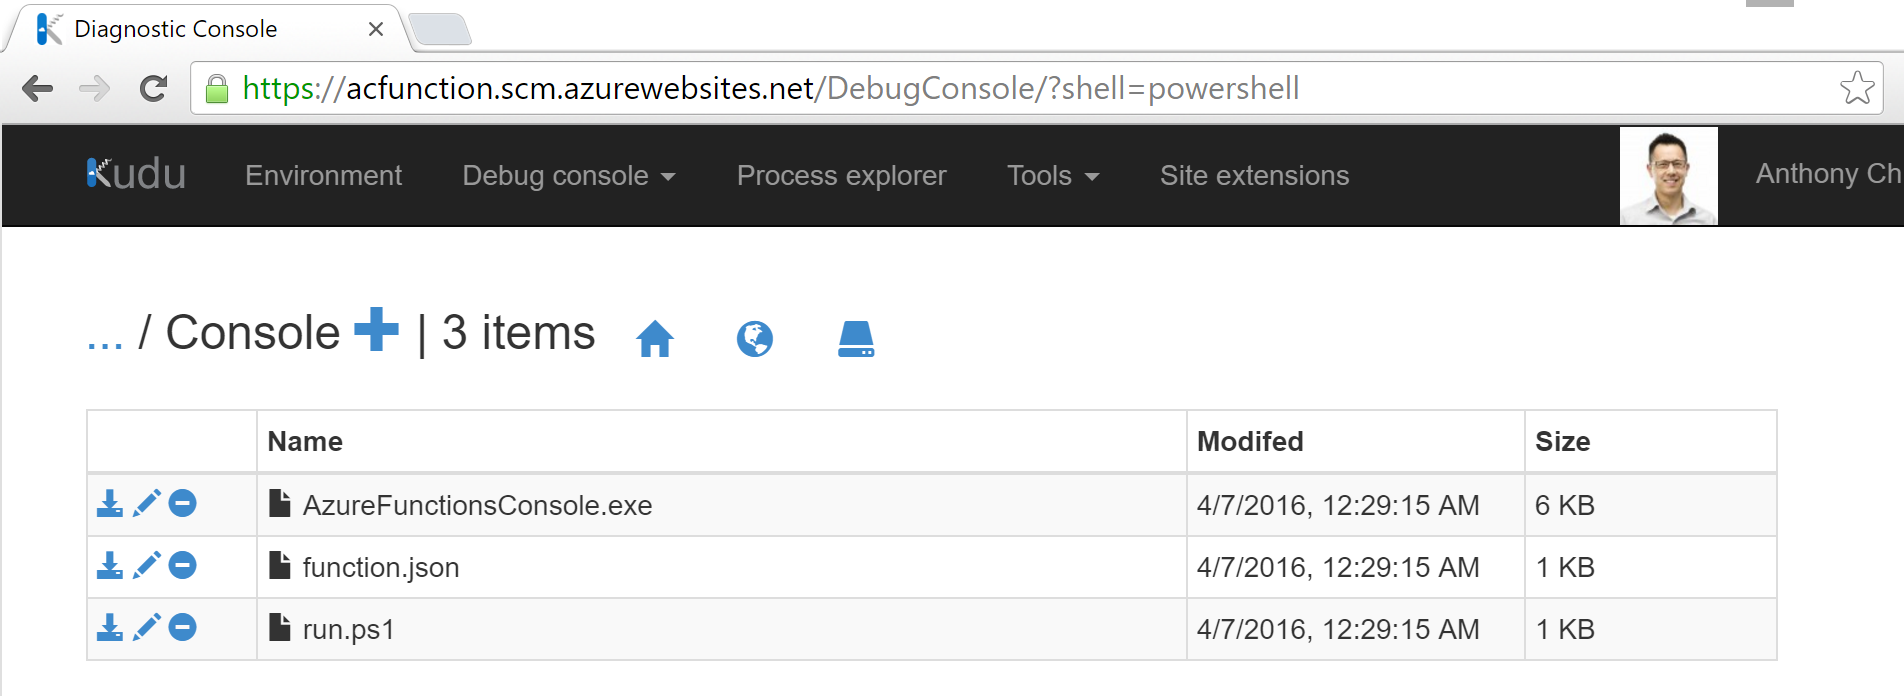
This is what the folder should look like now:

And that's it! Our function is ready (it starts running as soon as you upload function.json)!
Running and Monitoring the Function
Azure Functions is still very new, but there's already a lot of insight into its execution.
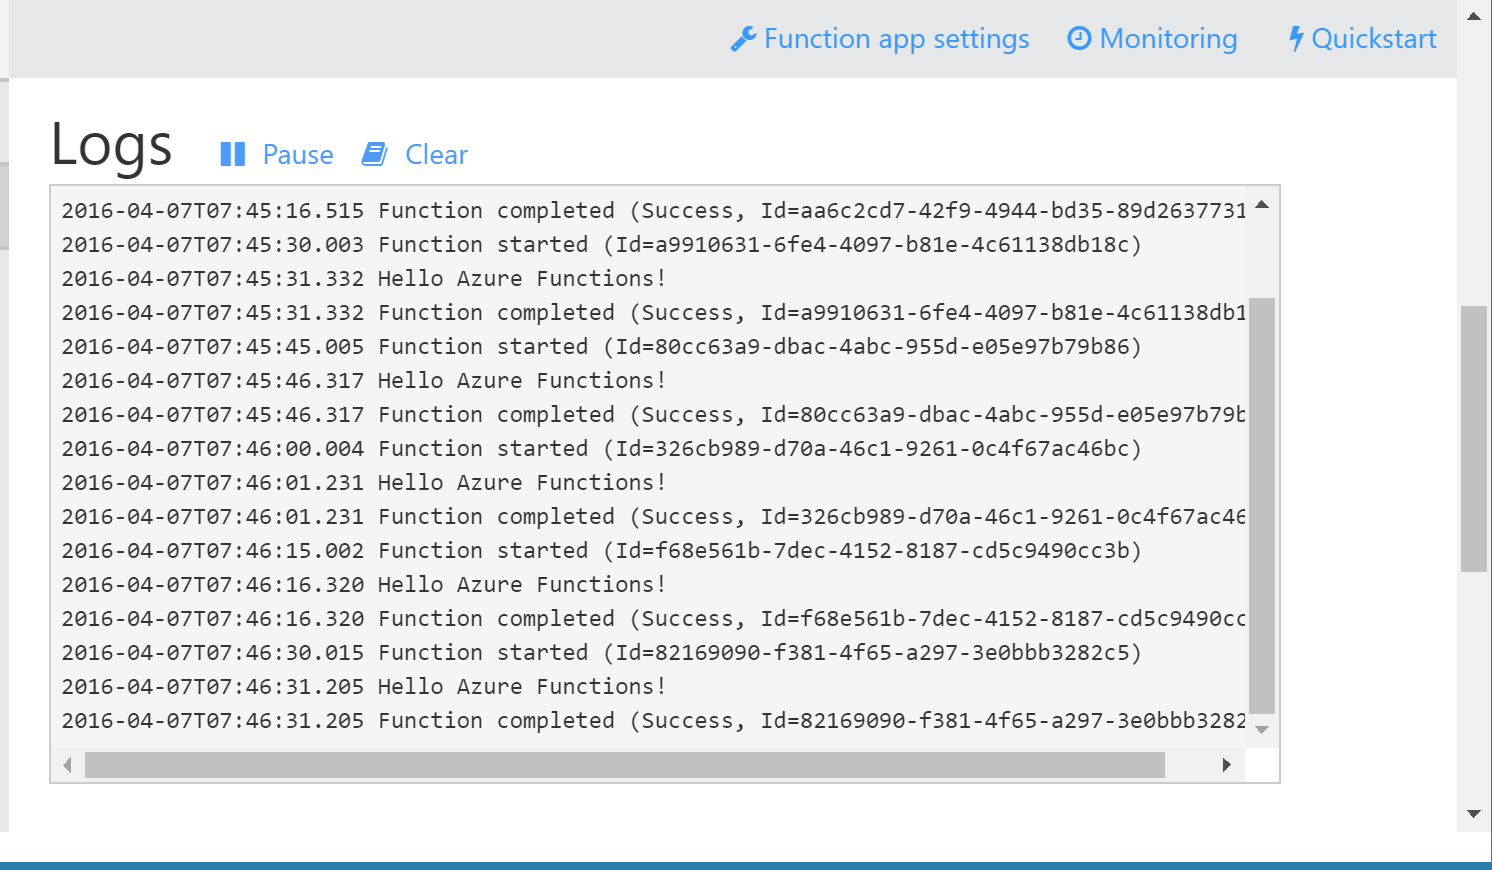
If we open the function in the Azure Portal, we can see its streaming logs. We can see that it's running.

There is even more information under the "Monitoring" tab.
Environment Variables
A great feature of Azure App Service is the ability to set environment variables. Function Apps can use these as well.
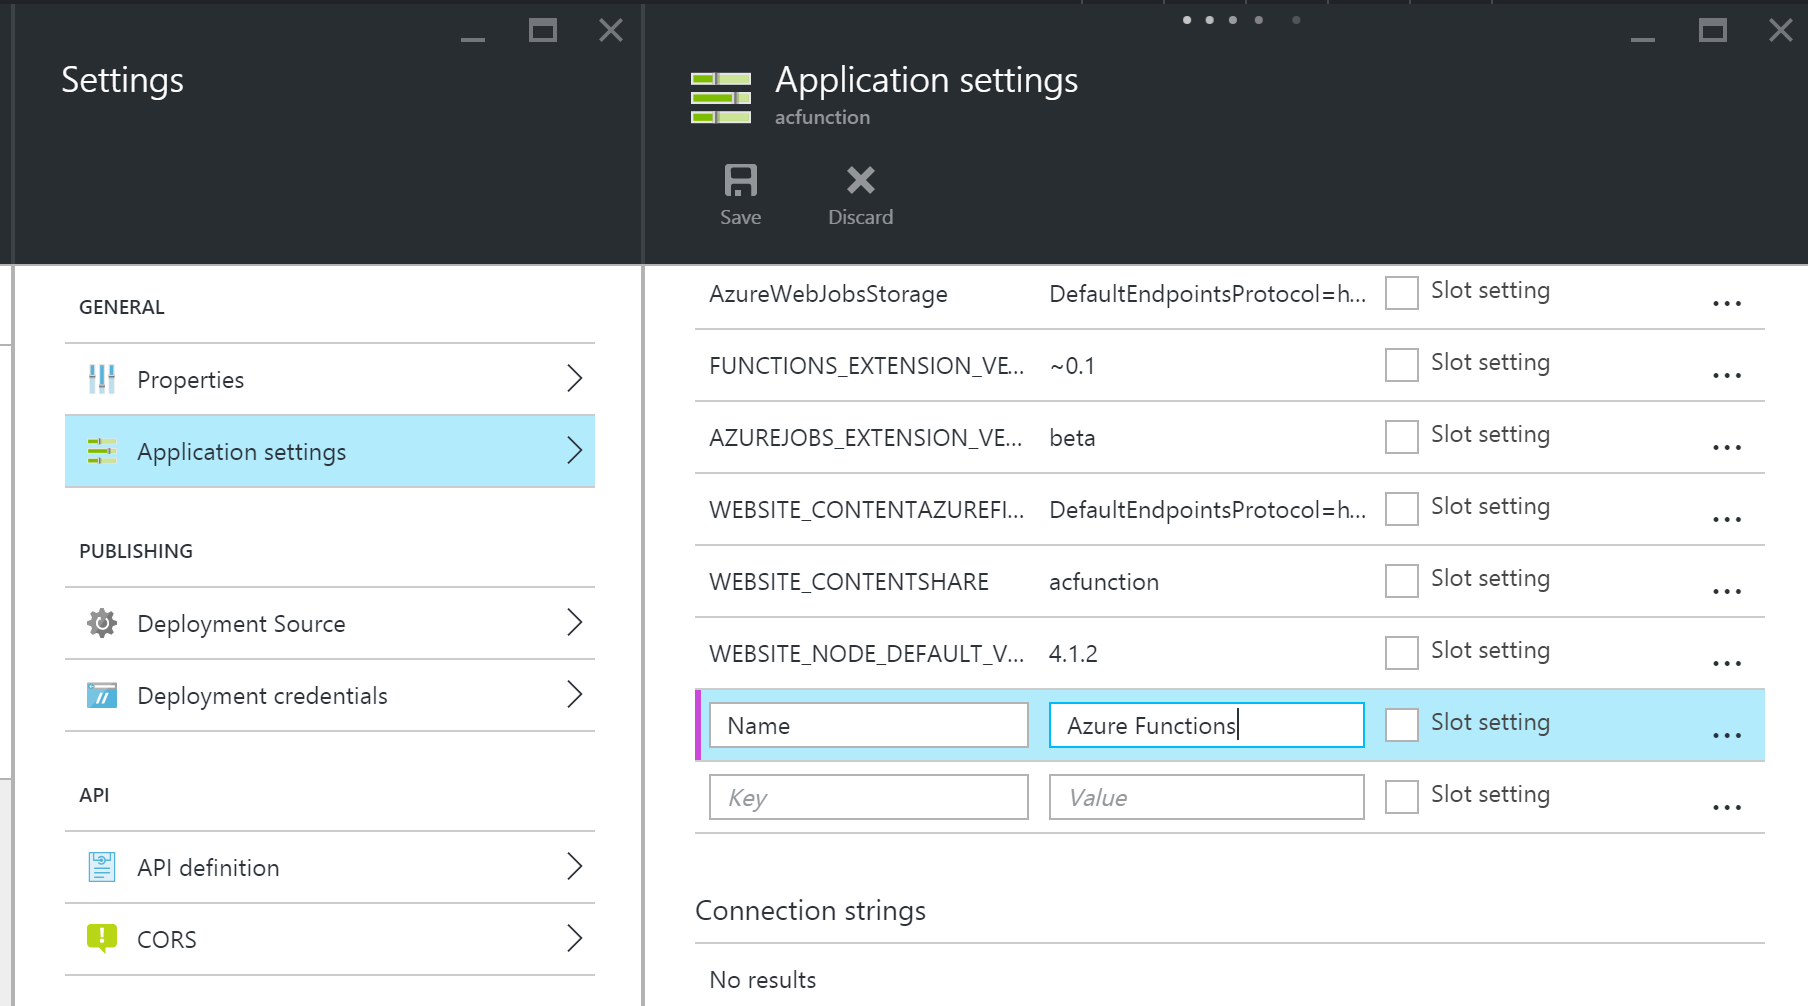
In the Azure Portal, go to the Application Settings of the Function App. We'll add an environment variable called Name and give it a value.

We'll make a slight tweak to our application and upload it:
Console.WriteLine($"Hello {Environment.GetEnvironmentVariable("Name")}!");
And now the environment variable is printed by the app!

One of the many big announcements at Build 2016 was Azure Functions. It's Microsoft's entry into the serverless architecture space and their answer to Amazon Lambda.
With Azure Functions, we can deploy little units of code that are run on-demand or via an already large variety of triggers. We are only billed for resources consumed during code execution and scaling is all handled for us.
Today we'll look at how we can run existing Windows console applications on a scheduler in Azure Functions.
Overview
At all companies I've worked at, there have been machines or VMs whose sole job is to host console applications triggered by Windows Scheduler. Those machines are usually sitting around doing nothing but we're paying for them.
With the introduction of Azure Functions, we can now run these workloads in Azure and only pay for resources they consume when they're running. And the best part is there is no code change required to run these applications!
The Console App
For this sample, we'll just create the simplest Hello World console application. I'm not sure why I'm even including the source code here...
using System;
namespace AzureFunctionsConsole
{
class Program
{
static void Main(string[] args)
{
Console.WriteLine("Hello World!");
}
}
}
Create a Function App
We'll create a Function App in the Azure Portal:

Upload Console App as a Function
Now we can upload our console app as a Function.
Because Function Apps are just a special version of Azure Web Apps, all the usual suspects for deploying our code is there, such as WebDeploy, Git, FTP, etc. Today, we'll simply upload our code using the SCM (Kudu) web interface that comes with every Web App.
Now that our function is created, we can open up the app's Kudu portal. We can do this by adding .scm to the Function App's domain name. For instance, if the Function App's located at myfunctions.azurewebsites.net, its Kudu portal can be accessed at myfunctions.scm.azurewebsites.net. It is secured with the same credentials as the main Azure Portal.
Click on the "Debug console" menu and select "PowerShell". This will open up a nifty PowerShell console plus a file explorer. Navigate to D:\home\site\wwwroot.

A Function is simply a folder with a function.json file and our code/application inside. We'll click the "+" button and create a folder.
Inside the new folder, upload our console app by dragging and dropping it from Windows Explorer into the files explorer section of the page. Include any DLLs and config files that it needs.
Next, we'll create a PowerShell script named run.ps1 and upload it to the folder. This is the function itself. Inside we'll just have one line that calls our executable:
.\AzureFunctionsConsole.exe
Lastly, we'll create a file named function.json with the following content and upload it to the folder. This file is what turns our code (in this case, the PowerShell script) into a Function:
{
"bindings": [
{
"type": "timerTrigger",
"direction": "in",
"schedule": "*/15 * * * * *",
"runOnStartup": false
}
]
}
Here we're creating a timer trigger that executes every 15 seconds, specified using a cron expression. There are many other triggers that we can use.
This is what the folder should look like now:

And that's it! Our function is ready (it starts running as soon as you upload function.json)!
Running and Monitoring the Function
Azure Functions is still very new, but there's already a lot of insight into its execution.
If we open the function in the Azure Portal, we can see its streaming logs. We can see that it's running.

There is even more information under the "Monitoring" tab.
Environment Variables
A great feature of Azure App Service is the ability to set environment variables. Function Apps can use these as well.
In the Azure Portal, go to the Application Settings of the Function App. We'll add an environment variable called Name and give it a value.

We'll make a slight tweak to our application and upload it:
Console.WriteLine($"Hello {Environment.GetEnvironmentVariable("Name")}!");
And now the environment variable is printed by the app!

