
Running a VSTS Docker Agent in Kubernetes
Monday, April 24, 2017
Kubernetes and Visual Studio Team Services are my two favorite things to hack on these days. Today we'll look at how to run VSTS private build agents in Kubernetes.
Why run VSTS agents in Kubernetes?
Save money
One reason we might want to run VSTS agents in Kubernetes is to save costs. Each VSTS account comes with 240 build minutes per month. After they're used up, we have to pay $40. That isn't a lot. But if we're running a Kubernetes cluster anyway, it might be advantageous to run our own VSTS agents on there.
In the past, it was difficult to set up and maintain agent machines. But now VSTS agents can run as Docker containers; this makes it really simple to run them in Kubernetes.
Run tests on services not accessible by VSTS hosted agents
Another reason to run VSTS agents in Kubernetes is to make it possible to run integration and functional tests on services in the cluster that do not have a public endpoint. This is the scenario we'll talk about today.
Services in Kubernetes can be exposed directly through a load balancer or via an ingress. But other services such as those of type ClusterIP are not reachable from the public internet and are difficult to test from a cloud service like VSTS.
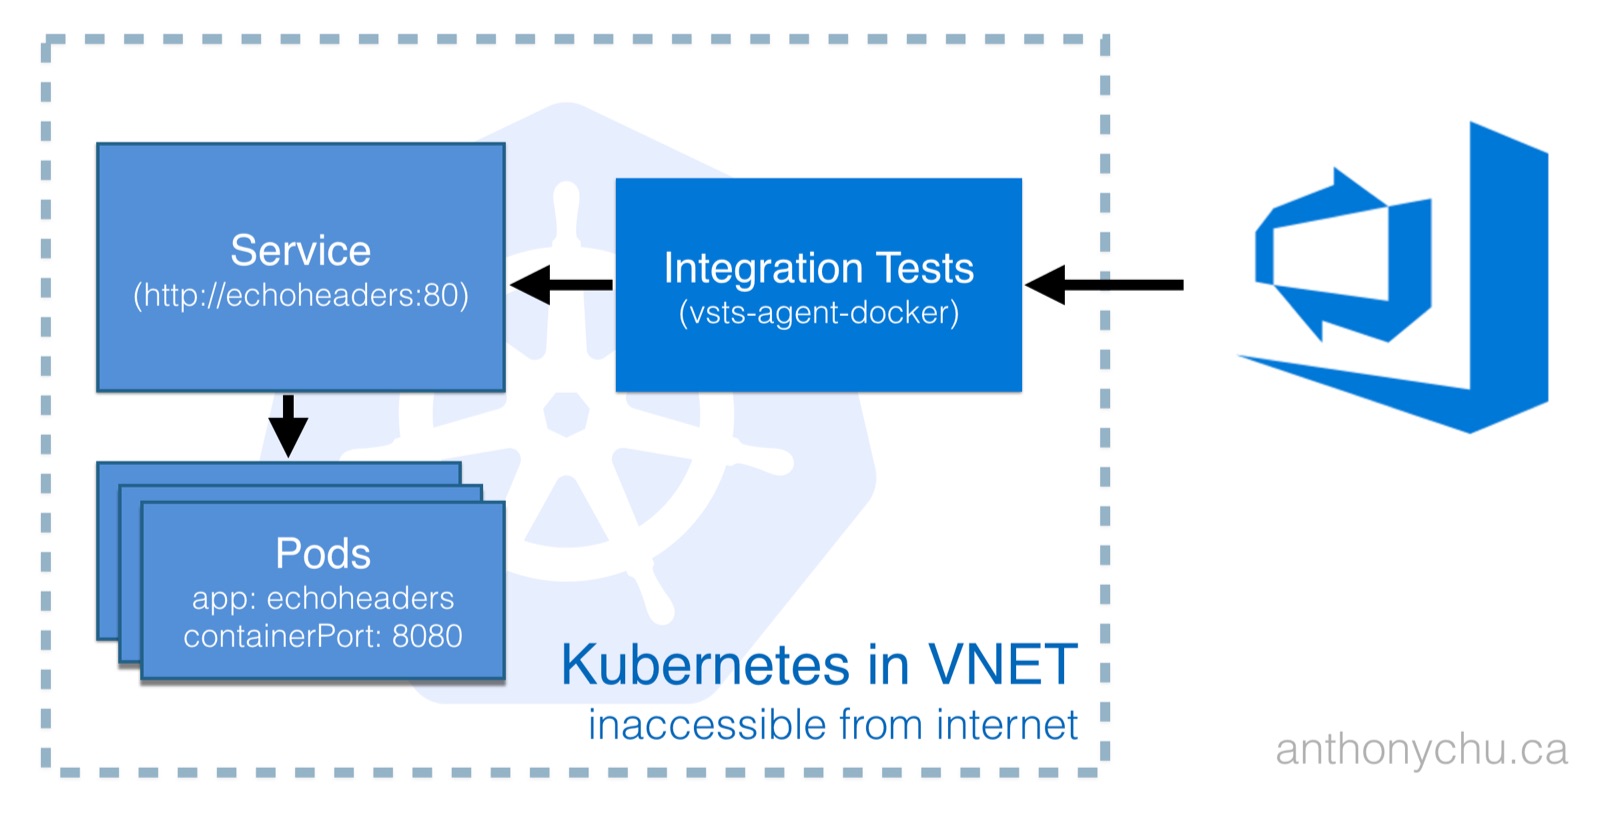
By running a VSTS agent in the cluster, we make it possible to test any service, regardless of type. Kubernetes services have a stable name that can be resolved via DNS. This makes it really easy for the VSTS agent to talk to other services in the cluster.
Setting up the VSTS Docker agent
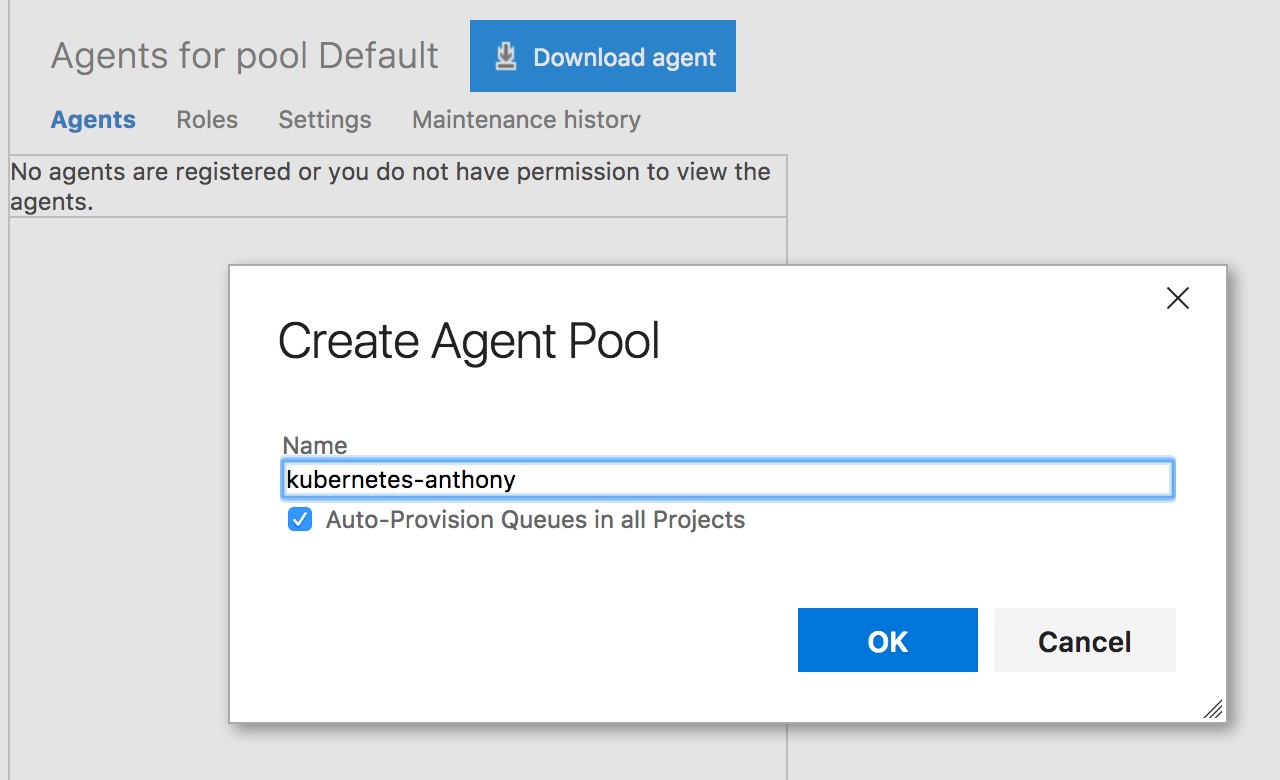
It only takes a few minutes to get a VSTS agent running in a Kubernetes cluster. The first step is to create an agent pool. This can be done on the Agent Pools page under the main account settings.
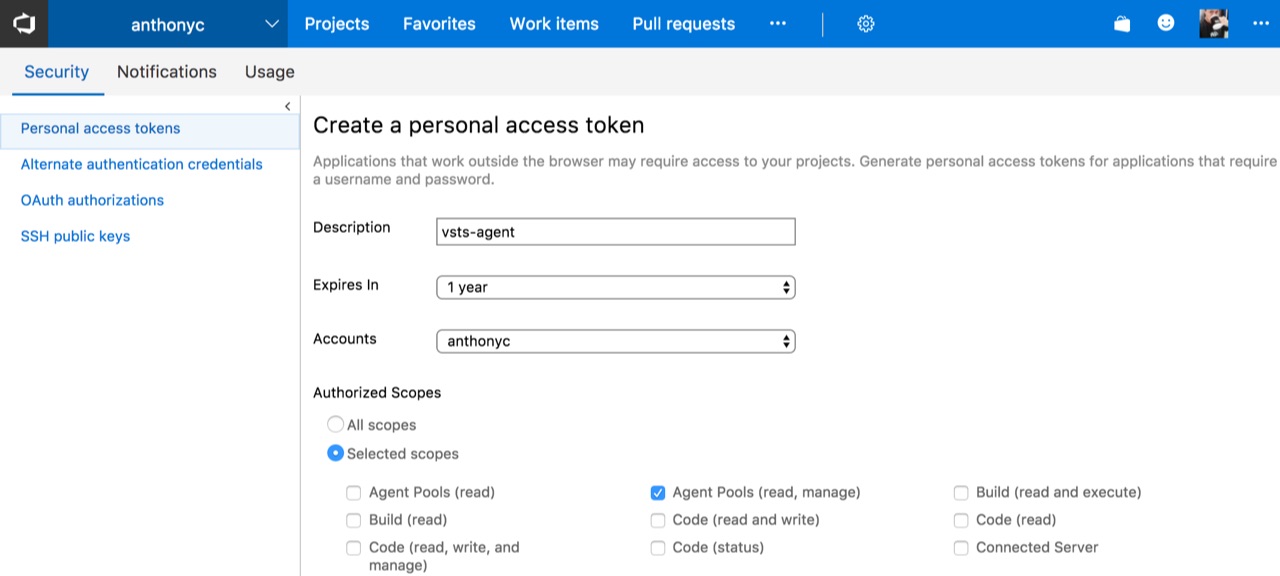
Next, we need to create a personal access token with the Agent Pools (read, manage) scope that each agent will use to connect to VSTS. This can be generated in the Security section of our profile.
Take the token and create a secret in Kubernetes containing the token and the account name:
$ kubectl create secret generic vsts --from-literal=VSTS_TOKEN=<VSTS-TOKEN-HERE> --from-literal=VSTS_ACCOUNT=anthonyc
And then we can run our agent by applying this Kubernetes manifest:
apiVersion: v1
kind: ReplicationController
metadata:
  name: vsts-agent
spec:
  replicas: 1
  template:
    metadata:
      labels:
        app: vsts-agent
        version: "0.1"
    spec:
      containers:
      - name: vsts-agent
        image: microsoft/vsts-agent:ubuntu-16.04-docker-17.03.0-ce-standard
        env:
          - name: VSTS_ACCOUNT
            valueFrom:
              secretKeyRef:
                name: vsts
                key: VSTS_ACCOUNT
          - name: VSTS_TOKEN
            valueFrom:
              secretKeyRef:
                name: vsts
                key: VSTS_TOKEN
          - name: VSTS_POOL
            value: kubernetes-anthony
        volumeMounts:
        - mountPath: /var/run/docker.sock
          name: docker-volume
      volumes:
      - name: docker-volume
        hostPath:
          path: /var/run/docker.sock
This runs the agent with the proper credentials to connect to VSTS. Note that VSTS_POOL needs to be set to the name of the agent pool we created earlier. We also enable Docker support inside the container.
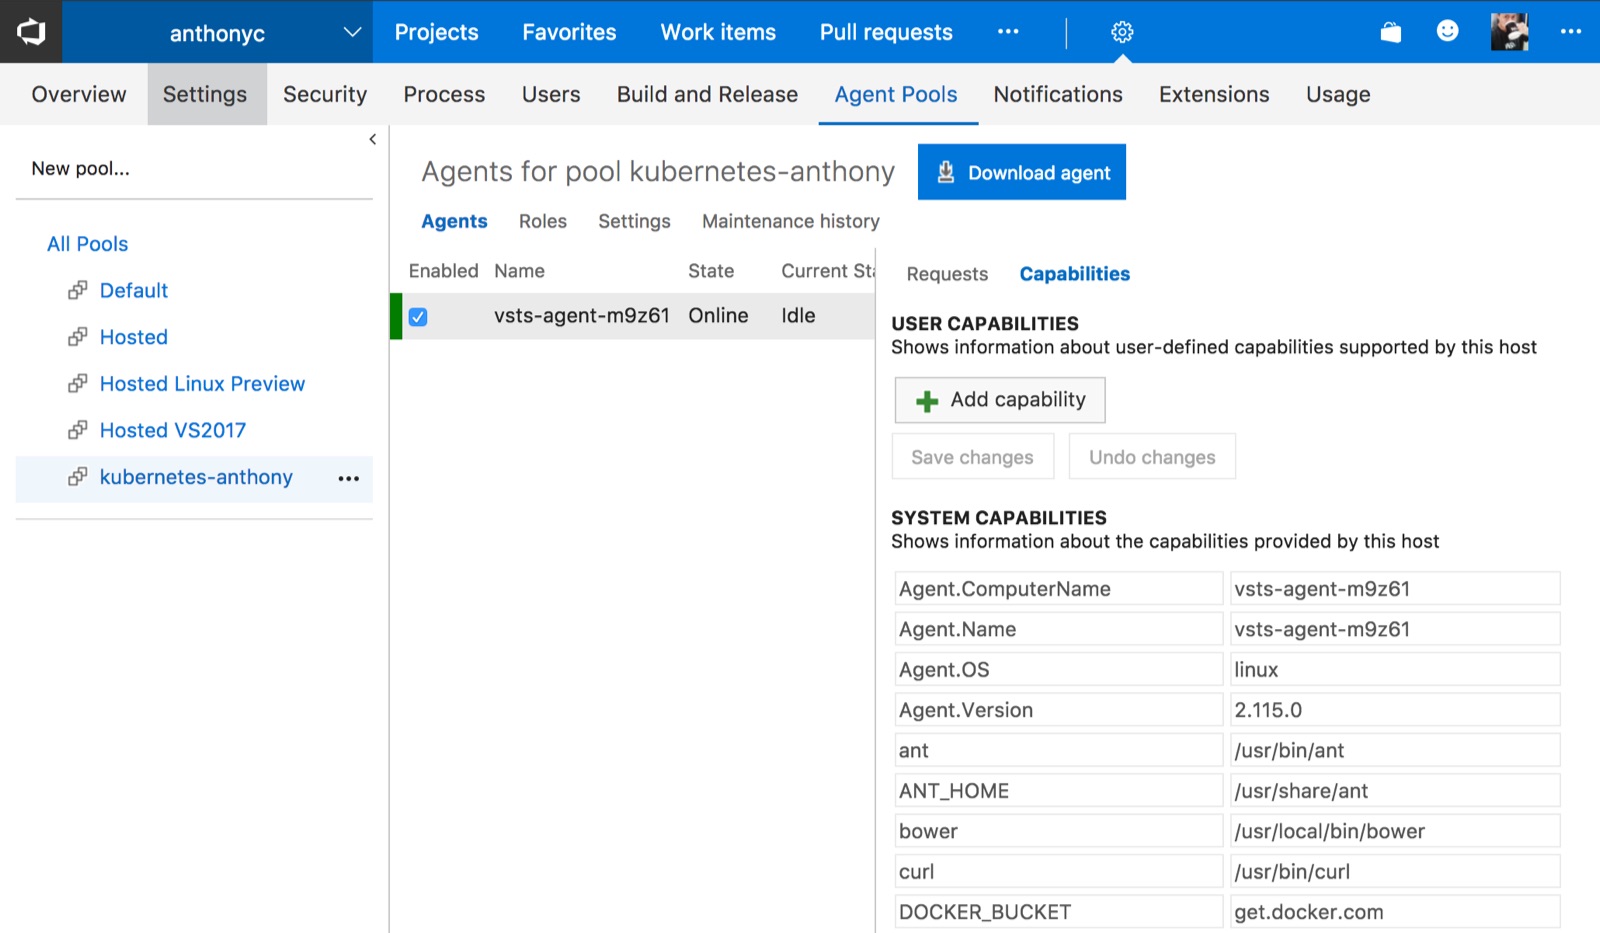
If we did everything properly, we should be able to see the agent in the pool:
Deploying an application to test
For simplicity, we'll deploy a dummy service to our cluster that echos back HTTP headers. It consists of a service of type ClusterIP and a replication controller:
apiVersion: v1
kind: Service
metadata:
  name: echoheaders
  labels:
    app: echoheaders
spec:
  type: ClusterIP
  ports:
  - port: 80
    targetPort: 8080
    protocol: TCP
    name: http
  selector:
    app: echoheaders

---

apiVersion: v1
kind: ReplicationController
metadata:
  name: echoheaders
spec:
  replicas: 1
  template:
    metadata:
      labels:
        app: echoheaders
    spec:
      containers:
      - name: echoheaders
        image: gcr.io/google_containers/echoserver:1.4
        ports:
        - containerPort: 8080
Write a test
We'll use Jest to write a simple test to assert that the echo service returns 200.
const request = require('superagent');

const url = process.env.ENDPOINT_URL || 'http://echoheaders';

describe('GET ' + url, () => {
    it('should return 200', done => {
        request
            .get(url)
            .then(res => {
                expect(res.status).toEqual(200);
                done();
            });
    });
});
Note that we're using the service name to access the service. The name is resolved by Kubernete's DNS. There's no need to worry about IP addresses or randomly-assigned ports.
Run the test during a VSTS release
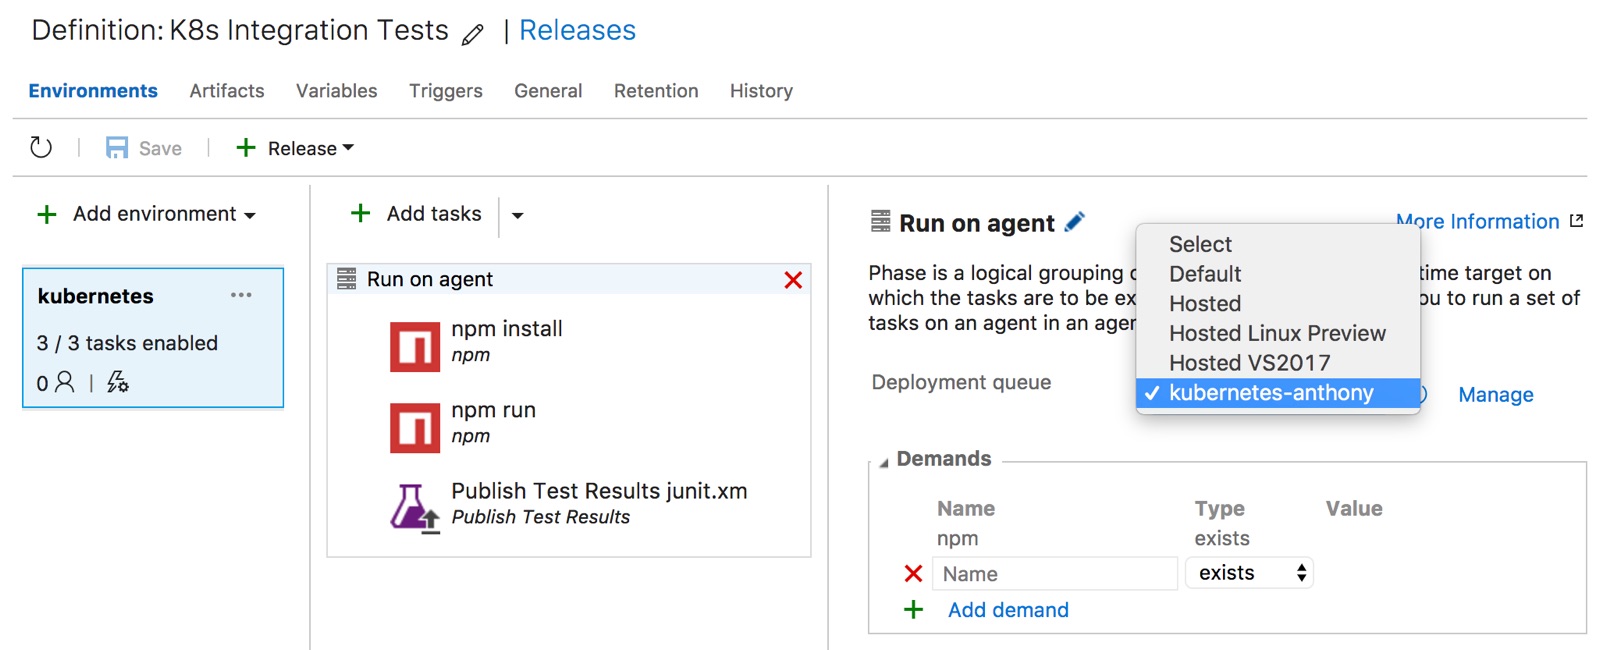
We can run tests from either a build or a release in VSTS. Because integration and functional tests tend to run after an app is released to a certain environment, we'll call the test from a release. The test files need to be available as artifacts from a build or from a source repository.
It's a very simple release pipeline. The tricky part is finding the "Run on agent" page and setting the Deployment queue to the proper pool name that we created earlier.
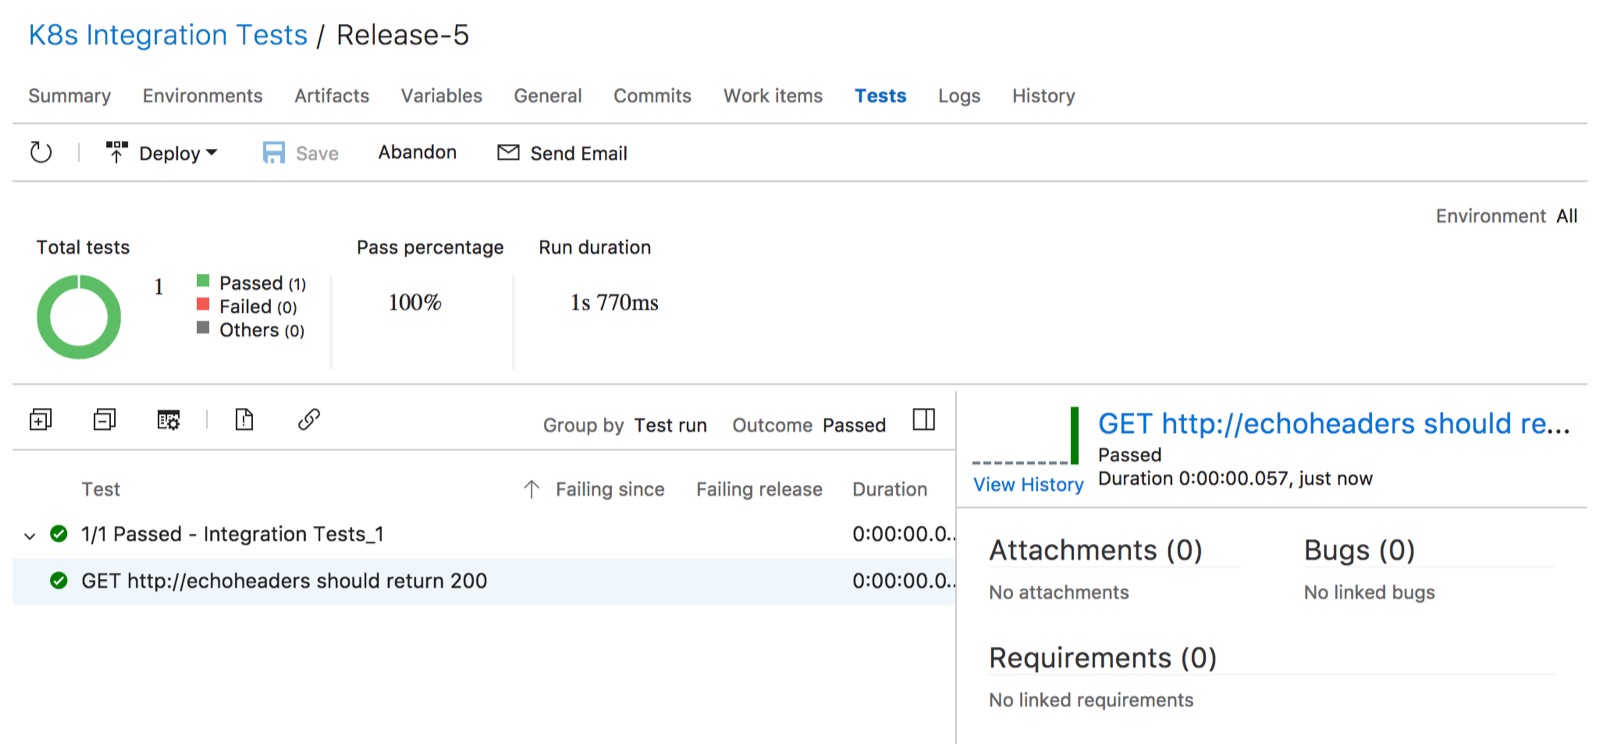
Now if we did everything properly, we should be able to create a new release and the test should run successfully in the Kubernetes cluster.
Source code
https://github.com/anthonychu/vsts-kubernetes-integration-test
Kubernetes and Visual Studio Team Services are my two favorite things to hack on these days. Today we'll look at how to run VSTS private build agents in Kubernetes.
Why run VSTS agents in Kubernetes?
Save money
One reason we might want to run VSTS agents in Kubernetes is to save costs. Each VSTS account comes with 240 build minutes per month. After they're used up, we have to pay $40. That isn't a lot. But if we're running a Kubernetes cluster anyway, it might be advantageous to run our own VSTS agents on there.
In the past, it was difficult to set up and maintain agent machines. But now VSTS agents can run as Docker containers; this makes it really simple to run them in Kubernetes.
Run tests on services not accessible by VSTS hosted agents
Another reason to run VSTS agents in Kubernetes is to make it possible to run integration and functional tests on services in the cluster that do not have a public endpoint. This is the scenario we'll talk about today.
Services in Kubernetes can be exposed directly through a load balancer or via an ingress. But other services such as those of type ClusterIP are not reachable from the public internet and are difficult to test from a cloud service like VSTS.
By running a VSTS agent in the cluster, we make it possible to test any service, regardless of type. Kubernetes services have a stable name that can be resolved via DNS. This makes it really easy for the VSTS agent to talk to other services in the cluster.
Setting up the VSTS Docker agent
It only takes a few minutes to get a VSTS agent running in a Kubernetes cluster. The first step is to create an agent pool. This can be done on the Agent Pools page under the main account settings.
Next, we need to create a personal access token with the Agent Pools (read, manage) scope that each agent will use to connect to VSTS. This can be generated in the Security section of our profile.
Take the token and create a secret in Kubernetes containing the token and the account name:
$ kubectl create secret generic vsts --from-literal=VSTS_TOKEN=<VSTS-TOKEN-HERE> --from-literal=VSTS_ACCOUNT=anthonyc
And then we can run our agent by applying this Kubernetes manifest:
apiVersion: v1
kind: ReplicationController
metadata:
name: vsts-agent
spec:
replicas: 1
template:
metadata:
labels:
app: vsts-agent
version: "0.1"
spec:
containers:
- name: vsts-agent
image: microsoft/vsts-agent:ubuntu-16.04-docker-17.03.0-ce-standard
env:
- name: VSTS_ACCOUNT
valueFrom:
secretKeyRef:
name: vsts
key: VSTS_ACCOUNT
- name: VSTS_TOKEN
valueFrom:
secretKeyRef:
name: vsts
key: VSTS_TOKEN
- name: VSTS_POOL
value: kubernetes-anthony
volumeMounts:
- mountPath: /var/run/docker.sock
name: docker-volume
volumes:
- name: docker-volume
hostPath:
path: /var/run/docker.sock
This runs the agent with the proper credentials to connect to VSTS. Note that VSTS_POOL needs to be set to the name of the agent pool we created earlier. We also enable Docker support inside the container.
If we did everything properly, we should be able to see the agent in the pool:
Deploying an application to test
For simplicity, we'll deploy a dummy service to our cluster that echos back HTTP headers. It consists of a service of type ClusterIP and a replication controller:
apiVersion: v1
kind: Service
metadata:
name: echoheaders
labels:
app: echoheaders
spec:
type: ClusterIP
ports:
- port: 80
targetPort: 8080
protocol: TCP
name: http
selector:
app: echoheaders
---
apiVersion: v1
kind: ReplicationController
metadata:
name: echoheaders
spec:
replicas: 1
template:
metadata:
labels:
app: echoheaders
spec:
containers:
- name: echoheaders
image: gcr.io/google_containers/echoserver:1.4
ports:
- containerPort: 8080
Write a test
We'll use Jest to write a simple test to assert that the echo service returns 200.
const request = require('superagent');
const url = process.env.ENDPOINT_URL || 'http://echoheaders';
describe('GET ' + url, () => {
it('should return 200', done => {
request
.get(url)
.then(res => {
expect(res.status).toEqual(200);
done();
});
});
});
Note that we're using the service name to access the service. The name is resolved by Kubernete's DNS. There's no need to worry about IP addresses or randomly-assigned ports.
Run the test during a VSTS release
We can run tests from either a build or a release in VSTS. Because integration and functional tests tend to run after an app is released to a certain environment, we'll call the test from a release. The test files need to be available as artifacts from a build or from a source repository.
It's a very simple release pipeline. The tricky part is finding the "Run on agent" page and setting the Deployment queue to the proper pool name that we created earlier.
Now if we did everything properly, we should be able to create a new release and the test should run successfully in the Kubernetes cluster.
Source code
https://github.com/anthonychu/vsts-kubernetes-integration-test