
Deploying ASP.NET Core with Docker Swarm to Azure Container Service
Friday, April 22, 2016
The big announcements from Microsoft haven't slowed down since the Build conference a few weeks ago. Last week, Azure Container Service reached General Availability.
Azure Container Service provides a really simple way to stand up a cluster to which we can deploy Docker images. Currently, it supports either Mesosphere DC/OS and Docker Swarm.
In this article we'll take a look at connecting to an Azure Container Service Docker Swarm cluster and deploying a simple ASP.NET Core application using the Docker CLI.
Connecting to the Cluster
There's pretty good documentation on how to set up an ACS cluster. After the cluster is set up, we can connect to it.
We'll be using Windows here, but it works pretty much the same on the Mac. Make sure the SSH tunnel is set up using PuTTY and the Docker CLI is installed. Open a Command Prompt.
To get Docker to connect to the Docker Swarm cluster on ACS, we just have to set the DOCKER_HOST environment variable to the port for which we have the SSH tunnel open.
> set DOCKER_HOST = tcp://localhost:2375
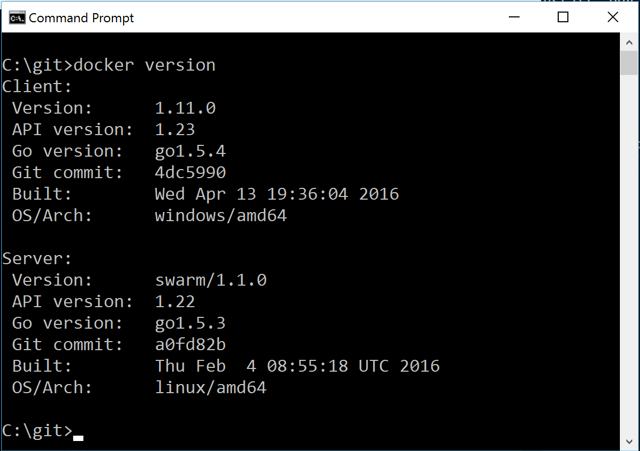
Now we can run docker version to confirm that we're indeed connected to the Swarm cluster:
Creating an ASP.NET Project
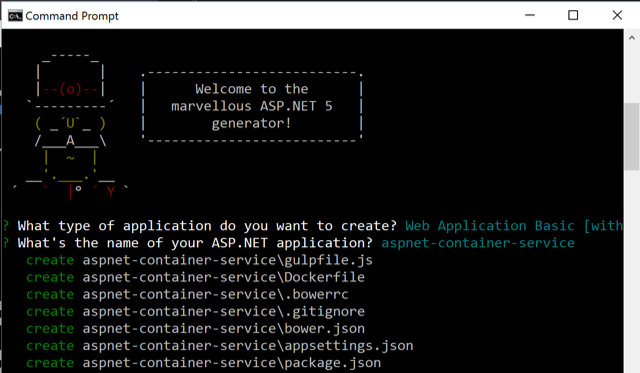
Create a simple ASP.NET project. The easiest way is to use the ASP.NET Core Yeoman generator (yo aspnet); although Visual Studio works just fine as well.
The generated project should already have a Dockerfile (if not, create a file named Dockerfile in the project root). Change its contents to this (this is for ASP.NET Core RC1, it will be different for RC2 and beyond):
FROM microsoft/aspnet:1.0.0-rc1-update1

RUN printf "deb http://ftp.us.debian.org/debian jessie main\n" >> /etc/apt/sources.list
RUN apt-get -qq update && apt-get install -qqy sqlite3 libsqlite3-dev && rm -rf /var/lib/apt/lists/*

COPY . /app
WORKDIR /app
RUN ["dnu", "restore"]

EXPOSE 5000/tcp
ENTRYPOINT ["dnx", "-p", "project.json", "Microsoft.AspNet.Server.Kestrel", "--server.urls", "http://0.0.0.0:5000"]
The last line is the most important. It's telling ASP.NET to listen to all network interfaces (0.0.0.0) instead of just localhost.
Docker Build and Docker Run
Now we can try building the Docker image on the remote cluster. Back in our command prompt where we set DOCKER_HOST (and making sure the SSH tunnel is still running), change to the project's root directory and run this command:
> docker build -t acs_aspnetcore .
Here, we're naming the image we're creating acs_aspnetcore and building it from the contents of the current folder. The necessary files are uploaded to the cluster and the build happens there.
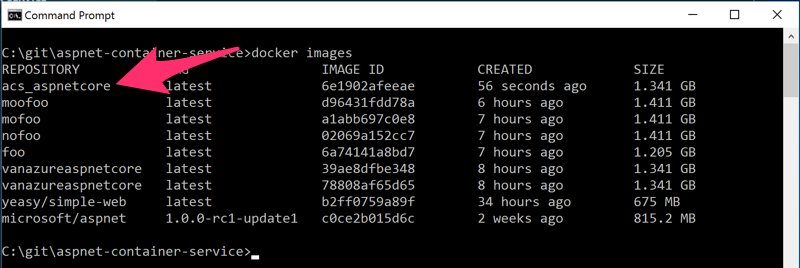
If the build is successful, we should be able to see our new image when we run docker images.
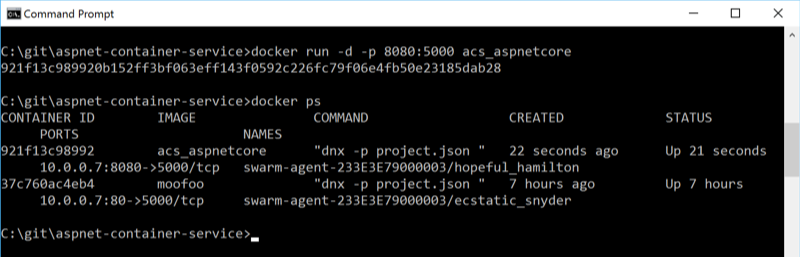
Now that we have the image built, we can run it. By default, ACS has ports 80, 8080, and 443 open on its load balancer. To run the container on port 8080:
docker run -d -p 8080:5000 acs_aspnetcore
Here, we're telling docker to run a container using the acs_aspnetcore image we created; and to do so in the background (-d for detached) and forward traffic to port 8080 on the host to port 5000 inside the container.
We can run docker ps to see that it's running and indeed forwarding port 8080 to 5000:
Try It Out
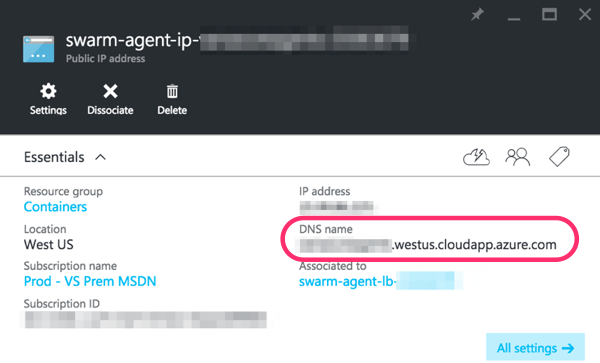
Now it's the moment of truth. Find the DNS name of the agents load balancer using the Azure Portal:
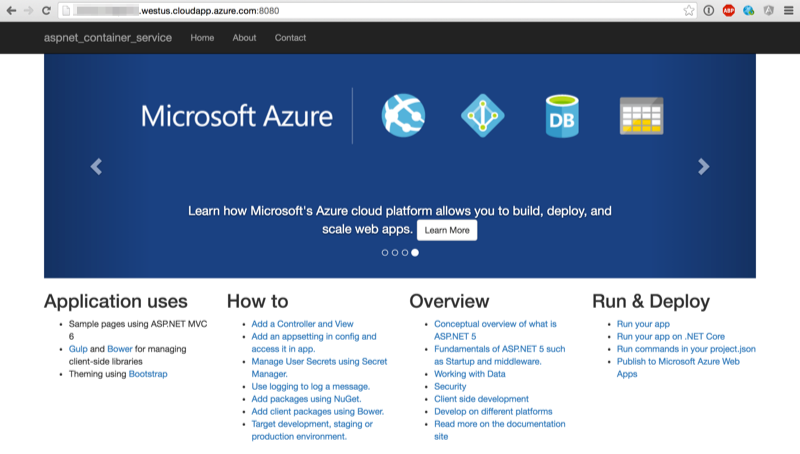
Open a browser and go to the DNS name at the port we specified in docker run and we should see our ASP.NET Core site:
This container is only deployed to one node in the cluster. To scale it out to multiple nodes, we have to push our Docker image to the Docker Hub and use Docker Compose. We'll look at that in a future post.
The big announcements from Microsoft haven't slowed down since the Build conference a few weeks ago. Last week, Azure Container Service reached General Availability.
Azure Container Service provides a really simple way to stand up a cluster to which we can deploy Docker images. Currently, it supports either Mesosphere DC/OS and Docker Swarm.
In this article we'll take a look at connecting to an Azure Container Service Docker Swarm cluster and deploying a simple ASP.NET Core application using the Docker CLI.
Connecting to the Cluster
There's pretty good documentation on how to set up an ACS cluster. After the cluster is set up, we can connect to it.
We'll be using Windows here, but it works pretty much the same on the Mac. Make sure the SSH tunnel is set up using PuTTY and the Docker CLI is installed. Open a Command Prompt.
To get Docker to connect to the Docker Swarm cluster on ACS, we just have to set the DOCKER_HOST environment variable to the port for which we have the SSH tunnel open.
> set DOCKER_HOST = tcp://localhost:2375
Now we can run docker version to confirm that we're indeed connected to the Swarm cluster:
Creating an ASP.NET Project
Create a simple ASP.NET project. The easiest way is to use the ASP.NET Core Yeoman generator (yo aspnet); although Visual Studio works just fine as well.
The generated project should already have a Dockerfile (if not, create a file named Dockerfile in the project root). Change its contents to this (this is for ASP.NET Core RC1, it will be different for RC2 and beyond):
FROM microsoft/aspnet:1.0.0-rc1-update1
RUN printf "deb http://ftp.us.debian.org/debian jessie main\n" >> /etc/apt/sources.list
RUN apt-get -qq update && apt-get install -qqy sqlite3 libsqlite3-dev && rm -rf /var/lib/apt/lists/*
COPY . /app
WORKDIR /app
RUN ["dnu", "restore"]
EXPOSE 5000/tcp
ENTRYPOINT ["dnx", "-p", "project.json", "Microsoft.AspNet.Server.Kestrel", "--server.urls", "http://0.0.0.0:5000"]
The last line is the most important. It's telling ASP.NET to listen to all network interfaces (0.0.0.0) instead of just localhost.
Docker Build and Docker Run
Now we can try building the Docker image on the remote cluster. Back in our command prompt where we set DOCKER_HOST (and making sure the SSH tunnel is still running), change to the project's root directory and run this command:
> docker build -t acs_aspnetcore .
Here, we're naming the image we're creating acs_aspnetcore and building it from the contents of the current folder. The necessary files are uploaded to the cluster and the build happens there.
If the build is successful, we should be able to see our new image when we run docker images.
Now that we have the image built, we can run it. By default, ACS has ports 80, 8080, and 443 open on its load balancer. To run the container on port 8080:
docker run -d -p 8080:5000 acs_aspnetcore
Here, we're telling docker to run a container using the acs_aspnetcore image we created; and to do so in the background (-d for detached) and forward traffic to port 8080 on the host to port 5000 inside the container.
We can run docker ps to see that it's running and indeed forwarding port 8080 to 5000:
Try It Out
Now it's the moment of truth. Find the DNS name of the agents load balancer using the Azure Portal:
Open a browser and go to the DNS name at the port we specified in docker run and we should see our ASP.NET Core site:
This container is only deployed to one node in the cluster. To scale it out to multiple nodes, we have to push our Docker image to the Docker Hub and use Docker Compose. We'll look at that in a future post.